# [zzz dead] unity devlog: jr programmer courses

fuck unity shenanagans  
Also Unreal is better imo, but ok, and I still have to use it for VRChat stuff  
  
and also cybersecurity learning

# adressing the formating

as i do courses my formating does change from start to finish, i will attempt to adhear to a standard or the standard however i will not be updating my formating on older doccuments so hand in there

# unit 1.1 game 1 dev log

# part 1/day 1

- [x] welcome 
    - [x] is a video saying that the course exists
- [x] watch, then do 
    - [x] is a video saying watch t hen do what the guy does for the tutuorals  
        lol
- [x] apparently the content will no longer be available as of July 31, 2023  
    soooooo that's my deadline :D
- [x] install unity 
    - [x] I'm using unity 2021.3.24f the lts version
    - [x] with visual studio code editor 2023 edition
    - [x] already logged in
- [x] if u complete courses u gain xp???? 
    - [x] +10 Unity Essentials xp &amp;
    - [x] +60 programming xp?????????
    - [x] u need 500 xp to level up past lvl 1
    - [x] kinda cringe imo
- [x] UNIT 1 3d truck driving game where u avoid or crash into boxes 
    - [x] I need this coz camera control and also 3d models not working in gnz

Educator Plan  
By the end of this lesson, you will be able to:

- Create a new project through Unity Hub
- Navigate 3D space and the Unity Editor comfortably
- Add and manipulate objects in the scene to position them where you want
- Position a camera in an ideal spot for your game
- Control the layout of Unity Editor to suit your needs

- [x] download [Prototype 1 - Starter Files.zip](https://connect-prd-cdn.unity.com/20210923/c709e76b-3e93-4140-8675-f694b9f04399/Prototype%201%20-%20Starter%20Files.zip)
    - [x] does this link even work in the future???
    - [x] [https://connect-prd-cdn.unity.com/20210923/c709e76b-3e93-4140-8675-f694b9f04399/Prototype%201%20-%20Starter%20Files.zip](https://connect-prd-cdn.unity.com/20210923/c709e76b-3e93-4140-8675-f694b9f04399/Prototype%201%20-%20Starter%20Files.zip)
- [x] omg they talk so slow, 3x speed it is, tldr make new unity app/folder
- [x] extract assets from starter files, then import the unity file in the zip
- [x] <span data-offset-key="a0t9-0-0"><span data-text="true">the </span></span><span data-offset-key="a0t9-0-1"><span data-text="true">Project</span></span><span data-offset-key="a0t9-0-1" style="font-weight: bold;"> </span><span data-offset-key="a0t9-0-2"><span data-text="true">window, in </span></span><span data-offset-key="a0t9-0-3" style="font-style: italic;"><span data-text="true">Assets &gt; Scenes &gt; </span></span><span data-offset-key="a0t9-0-4"><span data-text="true">double-click on the </span></span><span data-offset-key="a0t9-0-5"><span data-text="true">Prototype 1 scene</span></span><span data-offset-key="a0t9-0-6"><span data-text="true"> to open </span></span>
- [x] <span data-offset-key="a0t9-0-6"><span data-text="true">delete sample scene?</span></span>
- [x] <span data-offset-key="a0t9-0-6"><span data-text="true">roblox camera control to look around XD</span></span>
    - [ ] <span data-offset-key="a0t9-0-6"><span data-text="true">whoa everything is so small , I was right my models were too big I'm gnz  
        </span></span>
- [ ] <span data-offset-key="a0t9-0-6"><span data-text="true">  
    </span></span>
- [ ]

# day 2 unity jr programercourse

Man the guy talks slowly,   
unit 1.1  
important info

your home view if you will. it centers your camera on the object that you have selected.  
god I love how smooooooooooooooothe these Phoenix switches are on my keyboard and wish I could just put them on my k3 but no ;-;

  
the f key enables focus mode, this is like when u double click the middle mouse button in fusion to get to a decent reference frame for your object/file. it is primarily used to lock onto an object in space to move the camera and make it work

- alt left click drag allows you to rotate your camera around the object that you have selected
- alt right-click drag allows you to zoom but idk if I like using it but hay information is information

I can't believe it's an 8-minute video explaining this to the user

unit 1.1-4  
in the transform component of an object you can select the menu button and click reset to reset the cords to all default

apparently, in unity, it's commonly accepted knowledge that each unit is one metre.

meaning yes my objects for my gnz project day 2/3 was indeed too big

they also tell us that we can rename the object in the component's window or in the hierarchy window

this happened on accident but you can maximize a screen by doing shift+space  
they also want us to name the obstacle of our choice obstacle

a 3.5 min video saying

ctrl+p starts/stops play mode

and play mode does not save your game state  
if you click the arrows on the cube on the top right part of the scene thoe arrows will align your camera with the axis that you select.  
also the circular tool by the move or pan tool is for rotation  
the bottom one is for all types of transformation, scale rotation move   
  
uhhh the project folder area if you don't need to see the assets but just need to see file names/folder system the menu button for the project window has a 1 column layout for efficiency if you don't have the screen real estate for your desired view  
also on the top right you can click layout and change the layout by clicking the presets, personally, I don't want to use those for what I'm doing but it might be useful for certain game layouts, troubleshooting or games you are making

you can also save custom layouts

omg, finally I can do 1.2 :D   
c# scripting?

just so its easier on other devs and you so it doesn't create problems down the line  
DONT RENAME YOUR SCRIPTS  
because if u do it might cause problems coz of how its written  
just name it what its intended to do  
then make more   
or merge and fix the bugs

in the tutorial, u can just create a blank script in the project folder area and then drag it to the object but I can't? maybe it's a new unity thing  
BUT  
 you can just create one as a new component  
c# = c sharp or .cs  
in the line of code which apparently doesn't need a ;  
public class PlayerController : MonoBehaviour  
so the : kind of means x inherits from y   
so, in this case, the 3rd word "PlayerController" inherits from the class "MonoBehaviour"   
so ig ill write in shorthand   
idrk what the tutorial guy means but the void is a method but sure ill go with it  
 void Start() is called before the game starts (sort of) or before the first "frame"

 void Update() is called every "frame"

ofc // means everything is a comment on that line from that // mark  
It's common practice to capitalize certain things and not capitalize others, ex.  
code with capital letters means its class  
but lowercase letters are components  
 transform.Translate(0 , 0, 1);

so you write code in this way

```csharp
component.Method(arguments);
```

  
literally make it go vrooooomm and move forwards   
it uses x y z and its 1 unit per frame

okok so now

<span class="step-index_3pnc7n2S">4.</span>Use a Vector3 to move forward  
 transform.Translate(Vector3.forward);  
is literally the same thing  
but how do we make it so that its more than just along the z axis???  
idk its just shorthand for that  
we use the Vector3 library ig

we can modify that code to be like 20m/s with this  
 transform.Translate(Vector3.forward \* Time.deltaTime \* 20);

  
coz delta means change in y   
so delta time means change in time  
so this means using the vector3 library we will move forward by 1 unit \* 1 unit of time (second) \* 20   
or 1 unit per second \* 20  
or 20 units per second  
or 20u/s   
and since each unit is 1m   
its 20m/s  
  
OKOKOK  
so now <span data-offset-key="dgugu-0-5" style="font-weight: bold;"><span data-text="true">RigidBody</span></span>'s  
they are component that means the object its assigned to are a physics object, we can give it gravity and other things with this  
sphere colider and mesh colider make it a coliable object and has different ways of interacting with the player/ a given object  
mass is done in kilos :D

# New Page

`<span data-offset-key="apbfk-0-1" style="font-weight: bold; font-style: italic;"><span data-text="true">public float </span></span><span data-offset-key="apbfk-0-2" style="font-weight: bold; font-style: italic; text-decoration: underline;"><span data-text="true">speed</span></span><span data-offset-key="apbfk-0-3" style="font-weight: bold; font-style: italic;"><span data-text="true"> = 5.0f;</span></span>`

the word public can be changed to private, this denotes the accessability of the variable/class/other

`<span data-offset-key="apbfk-0-3" style="font-weight: bold; font-style: italic;"><span data-text="true"><span data-offset-key="apbfk-0-1" style="font-weight: bold; font-style: italic;">private float </span><span data-offset-key="apbfk-0-2" style="font-weight: bold; font-style: italic; text-decoration: underline;">speed</span> = 5.0f;</span></span>`

also this is done to initialize the default value of the variable in the script's component tab   
they are also known as access modifiers :D

when we do 5 as a variable, its only valid as an intiger, a whole number, so if we want to do fractional speeds we need to make it a floating point, a decimal number, so we could do 5.0, but its not understandable because its a decimal number

so since its not an intiger we need to use float to do decimals coz its a floating point number  
so then can do 5.0f to turn 5.0 into a readable understandable number for the game  
:D  
what happens when we do dword :D it doesn't tell us ;-;  
  
anyways next line of code  
this is similar to the public float speed = thing BUT  
it doesn't give us the number, or object its just a name

normally this doesn't work unless you assign a value in some programming languages but with c# if the script is assigned to an object ex. the camera you can drag an object into the player variable to reference what the player variable is, so ex we want the tank to be the player, (later the player model)

we can just put this code in the first level of the script in the public class and it will allow us to assign an object to the variable. whoa python is hard lmfao

 public GameObject Player;

ok so next line

in the void update() area

  
 transform.position = Player.transform.position;

<div class="flex-shrink-0 flex flex-col relative items-end" id="bkmrk-"><div class="w-[30px]"><div class="relative flex"><span style="box-sizing: border-box; display: inline-block; overflow: hidden; width: initial; height: initial; background: none; opacity: 1; border: 0px none; margin: 0px; padding: 0px; position: relative; max-width: 100%;">![User](https://chat.openai.com/_next/image?url=https%3A%2F%2Flh3.googleusercontent.com%2Fa%2FAGNmyxYznFTCHQPRIoyzvpOPF9nvwe3_Ef9StfW1veunMQ%3Ds96-c&w=96&q=75)</span></div></div></div><div class="relative flex w-[calc(100%-50px)] flex-col gap-1 md:gap-3 lg:w-[calc(100%-115px)]" id="bkmrk-so-basically-this-tr"><div class="relative flex w-[calc(100%-50px)] flex-col gap-1 md:gap-3 lg:w-[calc(100%-115px)]"><div class="flex flex-grow flex-col gap-3"><div class="min-h-[20px] flex flex-col items-start gap-4 whitespace-pre-wrap break-words">so basically this transforming the position of the camera to be exactly the same as the Players, including its transformed(updated) position  
so since we want to offset that  
we can add   
`<span data-offset-key="4ns9t-0-1" style="font-weight: bold; font-style: italic;"><span data-text="true">+ new Vector3(0, 5, -7)</span></span>`  
</div></div><div class="min-h-[20px] flex flex-col items-start gap-4 whitespace-pre-wrap break-words">we need to use a new vector3 variable (xyz)  
but since we need to be able to change that   
  
I messed with the code more and got the ideal maybe ggz angels   
</div></div></div>[![image.png](https://library.naruzkurai.tk/uploads/images/gallery/2023-05/scaled-1680-/kat3fOEPivN6WvnT-image.png)](https://library.naruzkurai.tk/uploads/images/gallery/2023-05/kat3fOEPivN6WvnT-image.png)

```c#
using System.Collections;
using System.Collections.Generic;
using UnityEngine;

public class FollowPlayer : MonoBehaviour
{

    public GameObject Player;
    private Vector3 offset;
    public float camera_x_offset = 0.0f;
    public float camera_y_offset = 5.0f;
    public float camera_z_offset = -7.0f;

    // Camera rotation offsets
    public float camera_x_rotation_offset = 0.0f;
    public float camera_y_rotation_offset = 0.0f;
    public float camera_z_rotation_offset = 0.0f;

    // Start is called before the first frame update
    void Start()
    {

    }

    // Update is called once per frame
    void Update()
    {
        offset = new Vector3(camera_x_offset, camera_y_offset, camera_z_offset);
        transform.position = Player.transform.position + offset;

        // Apply the rotation offsets
        Quaternion rotationOffset = Quaternion.Euler(camera_x_rotation_offset, camera_y_rotation_offset, camera_z_rotation_offset);
        transform.rotation = Player.transform.rotation * rotationOffset;
    }
}

```

this still follows the player when they move away and jump but hayyy its what I want later on when I deny up/down / in / out movement  
  
okok so important thing  
to midiage or remove studder we could make a smoother with another script  
OR fix the problem at the core sortof  
do void LateUpdate() instead of Update()  
this will make the camera's movement update be after the players position updates :D  
BRO  
someone should've told me sooner you can make the playmode color change wayyy more noticable

```
    From the top menu, go to Edit > Preferences (Windows) or Unity > Preferences (Mac) 
    In the left menu, choose Colors, then edit the “Playmode tint” color to have a slight color
    Play your project to test it, then close your preferences


```

programming/unity essentials xp +5 each

# temp

```

using System.Diagnostics;
using System.Collections;
using UnityEngine;

[DebuggerDisplay("{" + nameof(GetDebuggerDisplay) + "(),nq}")]
public class PlayerController : MonoBehaviour
{
    public float speed = 5.0f;
    // Start is called before the first frame update
    void Start()
    {

}

    // Update is called once per frame
    void Update()
    {
        //move the vheicule forward
        transform.Translate(Vector3.forward * Time.deltaTime * speed);
    }

    private string GetDebuggerDisplay()
    {
        return ToString();
    }
}

```

# Introduction to project management and teamwork + design documentation

What you will learn  
Absolute Beginner Project Management  
-Plan projects in the real-time development cycle  
-Manage projects in the real-time development cycle  
Summry  
Most jobs in the design and development world require teamwork and will use project management and planning tools to ensure successful project delivery. In this tutorial, you’ll be introduced to key concepts and best practices used for project planning, production phases, project management, and working in teams.

# stolin unity design doc

[because its stolen here's a link to where I got it  
https://connect-prd-cdn.unity.com/20201117/bb422f61-9b42-4521-9828-910aae22e39c/Example%20of%20Project%20Charter.pdf](https://connect-prd-cdn.unity.com/20201117/bb422f61-9b42-4521-9828-910aae22e39c/Example%20of%20Project%20Charter.pdf)

[![image.png](https://library.naruzkurai.tk/uploads/images/gallery/2023-05/scaled-1680-/LO2YN9BbSS3BMpxn-image.png)](https://library.naruzkurai.tk/uploads/images/gallery/2023-05/LO2YN9BbSS3BMpxn-image.png)

so ig this is what it would look like :D

# Stolen Unity Design doc v2

again since its stolen heres the link

[https://connect-prd-cdn.unity.com/20201117/99fd6c6b-0d44-42f5-9373-eb8a1887cacf/Project%20Design%20Doc%20TEMPLATE%20-%20\[GDOC\].pdf](https://connect-prd-cdn.unity.com/20201117/99fd6c6b-0d44-42f5-9373-eb8a1887cacf/Project%20Design%20Doc%20TEMPLATE%20-%20%5BGDOC%5D.pdf)

[![image.png](https://library.naruzkurai.tk/uploads/images/gallery/2023-05/scaled-1680-/VhQqgoqAO8YS9FSZ-image.png)](https://library.naruzkurai.tk/uploads/images/gallery/2023-05/VhQqgoqAO8YS9FSZ-image.png)

# 1.Overview

<div id="bkmrk-project-management-a"><div class="" data-block="true" data-editor="editorBody_0" data-offset-key="7fm1b-0-0"><div class="public-DraftStyleDefault-block public-DraftStyleDefault-ltr" data-offset-key="7fm1b-0-0"><span data-offset-key="7fm1b-0-0"><span data-text="true">Project management and teamwork are often referred to as “soft skills” for design and development roles. Although project management can get technical, and there are several different project management methodologies you might encounter, it primarily takes teamwork — including communication and organization skills — to be a good project manager. Effective project management and teamwork involves:</span></span></div></div></div><div data-offset-key="a0hsg-0-0" id="bkmrk-"></div>- <div class="public-DraftStyleDefault-block public-DraftStyleDefault-ltr" data-offset-key="a0hsg-0-0"><span data-offset-key="a0hsg-0-0"><span data-text="true">Clear communication with teammates, clients, and other stakeholders</span></span></div>
- <div class="public-DraftStyleDefault-block public-DraftStyleDefault-ltr" data-offset-key="clll4-0-0"><span data-offset-key="clll4-0-0"><span data-text="true">Delivery of a final product to deadline</span></span></div>
- <div class="public-DraftStyleDefault-block public-DraftStyleDefault-ltr" data-offset-key="7mbei-0-0"><span data-offset-key="7mbei-0-0"><span data-text="true">A final product or output that satisfies the requirements established for the project and meets the defined goal(s)</span></span></div>

<div id="bkmrk-in-this-tutorial%2C-yo"><div data-offset-key="d9cfk-0-0">  
</div><div class="" data-block="true" data-editor="editorBody_0" data-offset-key="d9cfk-0-0"><div class="public-DraftStyleDefault-block public-DraftStyleDefault-ltr" data-offset-key="d9cfk-0-0"><span data-offset-key="d9cfk-0-0"><span data-text="true">In this tutorial, you’ll explore some introductory best practices for managing projects and working in teams.</span></span></div></div></div>

# 2.Recap the phases of production

<div id="bkmrk-individuals%2C-teams%2C-"><div class="" data-block="true" data-editor="editorBody_1" data-offset-key="fhhg0-0-0"><div class="public-DraftStyleDefault-block public-DraftStyleDefault-ltr" data-offset-key="fhhg0-0-0"><span data-offset-key="fhhg0-0-0"><span data-text="true">Individuals, teams, companies, and organizations will each have their particular methods for project management, but generally most projects break down into phases. </span></span></div></div><div data-offset-key="524nr-0-0">  
</div><div class="" data-block="true" data-editor="editorBody_1" data-offset-key="524nr-0-0"><div class="public-DraftStyleDefault-block public-DraftStyleDefault-ltr" data-offset-key="524nr-0-0"><span data-offset-key="524nr-0-0"><span data-text="true">As you explored when learning about the </span></span>[<span data-offset-key="524nr-1-0" style="font-weight: bold;"><span data-text="true">real time production cycle</span></span>](https://learn.unity.com/tutorial/the-real-time-production-cycle)<span data-offset-key="524nr-2-0"><span data-text="true">, typically the phases of production are: </span></span></div></div></div>1. <div class="public-DraftStyleDefault-block public-DraftStyleDefault-ltr" data-offset-key="cpuqv-0-0"><span data-offset-key="cpuqv-0-0" style="font-weight: bold;"><span data-text="true">Pre-production</span></span><span data-offset-key="cpuqv-0-1"><span data-text="true">: The work done before full-scale production begins, such as planning, prototyping, pipeline setup, and initial designs. </span></span></div>


1. <div class="public-DraftStyleDefault-block public-DraftStyleDefault-ltr" data-offset-key="1djqv-0-0"><span data-offset-key="1djqv-0-0" style="font-weight: bold;"><span data-text="true">Production: </span></span><span data-offset-key="1djqv-0-1"><span data-text="true">Creation of the product and assets within it, including the creation of final 2D images and 3D models, audio, lighting, and user experience. </span></span></div>


1. <div class="public-DraftStyleDefault-block public-DraftStyleDefault-ltr" data-offset-key="1voff-0-0"><span data-offset-key="1voff-0-0" style="font-weight: bold;"><span data-text="true">Post-production: </span></span><span data-offset-key="1voff-0-1"><span data-text="true">Work done after the final product appears to be complete, including quality assurance (QA), editing, testing, bug fixing, and final polishing. </span></span></div>

2. <div class="public-DraftStyleDefault-block public-DraftStyleDefault-ltr" data-offset-key="cs96i-0-0"><span data-offset-key="cs96i-0-0" style="font-weight: bold;"><span data-text="true">Operations</span></span><span data-offset-key="cs96i-0-1"><span data-text="true">: Ongoing work after a product has been released to keep it running, such as sales, monetization, updates, and continued maintenance.</span></span></div>

<div id="bkmrk-"><div><div data-offset-key="8tml4-0-0"></div></div></div>[![image.png](https://library.naruzkurai.tk/uploads/images/gallery/2023-05/scaled-1680-/SP3finnrRL1NJ168-image.png)](https://library.naruzkurai.tk/uploads/images/gallery/2023-05/SP3finnrRL1NJ168-image.png)

<div id="bkmrk-select-image-to-expa"><div data-offset-key="8tml4-0-0"></div><div class="" data-block="true" data-editor="editorBody_1" data-offset-key="8tml4-0-0"><div class="public-DraftStyleDefault-block public-DraftStyleDefault-ltr" data-offset-key="8tml4-0-0"><span data-offset-key="8tml4-0-0"><span data-text="true">Properly planning for each phase of the production cycle is crucial when you need to deliver a project that is on time and works as expected. </span></span></div></div></div>

# 3.Overview of project planning

<div id="bkmrk-hen-working-on-proje"><div><div class="" data-block="true" data-editor="editorBody_2" data-offset-key="b0000-0-0"><div class="public-DraftStyleDefault-block public-DraftStyleDefault-ltr" data-offset-key="b0000-0-0"><span data-offset-key="b0000-0-0"><span data-text="true">hen working on projects, you need to plan appropriate schedules, manage time, communicate, and collaborate. Even if you’re working on a project independently, it’s likely that you’ll be communicating with others at some point in the production process, especially when engaging in </span></span>[<span data-offset-key="b0000-1-0" style="font-weight: bold;"><span data-text="true">user testing</span></span>](https://learn.unity.com/tutorial/introduction-to-user-feedback)<span data-offset-key="b0000-2-0"><span data-text="true">.</span></span></div></div><div data-offset-key="2fnte-0-0"></div><div class="" data-block="true" data-editor="editorBody_2" data-offset-key="2fnte-0-0"><div class="public-DraftStyleDefault-block public-DraftStyleDefault-ltr" data-offset-key="2fnte-0-0"><span data-offset-key="2fnte-0-0"><span data-text="true">Let’s explore some guidance for successfully completing and delivering projects, as an individual or member of a larger team.</span></span></div></div><div data-offset-key="79san-0-0"></div></div></div><div class="public-DraftStyleDefault-block public-DraftStyleDefault-ltr" data-offset-key="79san-0-0" id="bkmrk-documentation-and-tr"><span data-offset-key="79san-0-0"><span data-text="true">Documentation and tracking</span></span></div><div id="bkmrk-documentation-plays-"><div data-offset-key="ae1u5-0-0">  
</div><div class="" data-block="true" data-editor="editorBody_2" data-offset-key="ae1u5-0-0"><div class="public-DraftStyleDefault-block public-DraftStyleDefault-ltr" data-offset-key="ae1u5-0-0"><span data-offset-key="ae1u5-0-0"><span data-text="true">Documentation plays a critical role in project management. A </span></span><span data-offset-key="ae1u5-0-1" style="font-weight: bold;"><span data-text="true">design document</span></span><span data-offset-key="ae1u5-0-2"><span data-text="true"> acts as a single source of truth, where you can record the specific requirements for the experience that you want to create. The design document also supports producers and project managers to track design and development progress. </span></span></div></div><div data-offset-key="dcubi-0-0">  
</div><div class="" data-block="true" data-editor="editorBody_2" data-offset-key="dcubi-0-0"><div class="public-DraftStyleDefault-block public-DraftStyleDefault-ltr" data-offset-key="dcubi-0-0"><span data-offset-key="dcubi-0-0"><span data-text="true">When managing projects, consistently use design documents in the following ways to guide the design and development process:</span></span></div></div></div>- - <div class="public-DraftStyleDefault-block public-DraftStyleDefault-ltr" data-offset-key="7l97a-0-0"><span data-offset-key="7l97a-0-0"><span data-text="true">Identify the purpose, audience, and goals of your project.</span></span></div>
    - <div class="public-DraftStyleDefault-block public-DraftStyleDefault-ltr" data-offset-key="7l97a-0-0"><span data-offset-key="fbbkq-0-0"><span data-text="true">Identify the necessary project steps by creating a project plan.</span></span></div>
    - <div class="public-DraftStyleDefault-block public-DraftStyleDefault-ltr" data-offset-key="7l97a-0-0"><span data-offset-key="e046i-0-0"><span data-text="true">Within the project plan, create a timeline with specific deliverables and due dates.</span></span></div>
    - <div class="public-DraftStyleDefault-block public-DraftStyleDefault-ltr" data-offset-key="7l97a-0-0"><span data-offset-key="e046i-0-0"><span data-text="true">C</span></span><span data-offset-key="eu96b-0-0"><span data-text="true">onsistently track your milestones in order to produce deliverables and meet deadlines.</span></span></div>
    - <div class="public-DraftStyleDefault-block public-DraftStyleDefault-ltr" data-offset-key="7l97a-0-0"><span data-offset-key="eu96b-0-0"><span data-text="true">A</span></span><span data-offset-key="f6es9-0-0"><span data-text="true">ssign roles when working in teams, and define and prioritize tasks for you and all teammates</span></span></div>
    - <div class="public-DraftStyleDefault-block public-DraftStyleDefault-ltr" data-offset-key="7l97a-0-0"><span data-offset-key="55qlc-0-0"><span data-text="true">Make sure you and all teammates are following up and following through on roles and responsibilities.</span></span></div>

#### <span data-offset-key="75n7h-0-0"><span data-text="true">Time management</span></span>

<div id="bkmrk-effective-time-manag"><div data-offset-key="6cqbo-0-0"></div><div class="" data-block="true" data-editor="editorBody_2" data-offset-key="6cqbo-0-0"><div class="public-DraftStyleDefault-block public-DraftStyleDefault-ltr" data-offset-key="6cqbo-0-0"><span data-offset-key="6cqbo-0-0"><span data-text="true">Effective time management is critical to timely delivery and completion of the project. </span></span></div><div class="public-DraftStyleDefault-block public-DraftStyleDefault-ltr" data-offset-key="6cqbo-0-0"></div><div class="public-DraftStyleDefault-block public-DraftStyleDefault-ltr" data-offset-key="6cqbo-0-0"><span data-offset-key="6cqbo-0-0"><span data-text="true"> When managing projects:</span></span></div></div></div><div data-offset-key="d1i27-0-0" id="bkmrk-">  
</div>- <div class="public-DraftStyleDefault-block public-DraftStyleDefault-ltr" data-offset-key="d1i27-0-0"><span data-offset-key="d1i27-0-0"><span data-text="true">Scope time for each phase of the design and development process.</span></span></div>
- <div class="public-DraftStyleDefault-block public-DraftStyleDefault-ltr" data-offset-key="d1i27-0-0"><span data-offset-key="4s6a5-0-0"><span data-text="true">Review your project plan daily, and give brief daily status reports to the project manager or producer (often these daily updates are called “stand-ups”).</span></span></div>
- <div class="public-DraftStyleDefault-block public-DraftStyleDefault-ltr" data-offset-key="d1i27-0-0"><span data-offset-key="ara60-0-0"><span data-text="true">Use contingency planning for any unforeseen delays; reprioritize and update the tasks and deliverables in your project plans when needed.</span></span></div>
- <div class="public-DraftStyleDefault-block public-DraftStyleDefault-ltr" data-offset-key="d1i27-0-0"><span data-offset-key="2uimp-0-0"><span data-text="true">Identify which project planning and management tools are suitable for you or your team; when you’ve chosen them, use them consistently.</span></span></div>


#### <span data-offset-key="aka62-0-0"><span data-text="true">Communication</span></span>

<div id="bkmrk-without-clear-commun"><div data-offset-key="ebon2-0-0">  
</div><div class="" data-block="true" data-editor="editorBody_2" data-offset-key="ebon2-0-0"><div class="public-DraftStyleDefault-block public-DraftStyleDefault-ltr" data-offset-key="ebon2-0-0"><span data-offset-key="ebon2-0-0"><span data-text="true">Without clear communication, collaboration is challenging at best - and impossible at worst. Communication is one of the most important skills for working with others in any capacity, and is vital for effective project management.</span></span></div><div class="public-DraftStyleDefault-block public-DraftStyleDefault-ltr" data-offset-key="ebon2-0-0"></div></div><div class="" data-block="true" data-editor="editorBody_2" data-offset-key="fm4p9-0-0"><div class="public-DraftStyleDefault-block public-DraftStyleDefault-ltr" data-offset-key="fm4p9-0-0"><span data-offset-key="fm4p9-0-0"><span data-text="true"> When communicating with others on your project:</span></span></div></div></div><div data-offset-key="fcngf-0-0" id="bkmrk--1"></div>- <div class="public-DraftStyleDefault-block public-DraftStyleDefault-ltr" data-offset-key="fcngf-0-0"><span data-offset-key="fcngf-0-0"><span data-text="true">Be clear about your progress and any issues that impact the work of others, whether they are members of your team or supporting external collaborators.</span></span></div>
- <div class="public-DraftStyleDefault-block public-DraftStyleDefault-ltr" data-offset-key="fcngf-0-0"><span data-offset-key="13bac-0-0"><span data-text="true">Be respectful of others’ time — and of your own.</span></span></div>
- <div class="public-DraftStyleDefault-block public-DraftStyleDefault-ltr" data-offset-key="fcngf-0-0"><span data-offset-key="13atr-0-0"><span data-text="true">When critiquing work, remain constructive and sensitive to the feelings of others. Focus on making your feedback helpful, specific, and respectful.</span></span></div>
- <div class="public-DraftStyleDefault-block public-DraftStyleDefault-ltr" data-offset-key="fcngf-0-0"><span data-offset-key="ek7qj-0-0"><span data-text="true">Be open to feedback yourself by actively listening and engaging with the person delivering the feedback. Reflect honestly on how their feedback can be addressed.</span></span></div>


#### <span data-offset-key="dput6-0-0"><span data-text="true">Respect and professionalism</span></span>

<div id="bkmrk-even-if-you%E2%80%99re-compl"><div class="" data-block="true" data-editor="editorBody_2" data-offset-key="iapq-0-0"><div class="public-DraftStyleDefault-block public-DraftStyleDefault-ltr" data-offset-key="iapq-0-0"><span data-offset-key="iapq-0-0"><span data-text="true">Even if you’re completing a project for personal development or fun, when working with others it’s important to respect them and have a professional attitude in your work.</span></span></div></div><div data-offset-key="e5qc0-0-0">  
</div><div class="" data-block="true" data-editor="editorBody_2" data-offset-key="e5qc0-0-0"><div class="public-DraftStyleDefault-block public-DraftStyleDefault-ltr" data-offset-key="e5qc0-0-0"><span data-offset-key="e5qc0-0-0"><span data-text="true"> When collaborating on a project with others:</span></span></div></div></div>- <div class="public-DraftStyleDefault-block public-DraftStyleDefault-ltr" data-offset-key="bebf-0-0"><span data-offset-key="bebf-0-0"><span data-text="true">Be punctual.</span></span></div>
- <div class="public-DraftStyleDefault-block public-DraftStyleDefault-ltr" data-offset-key="bebf-0-0"><span data-offset-key="36c71-0-0"><span data-text="true">Promptly reply to collaborators, peers, and clients.</span></span></div>
- <div class="public-DraftStyleDefault-block public-DraftStyleDefault-ltr" data-offset-key="bebf-0-0"><span data-offset-key="36c71-0-0"><span data-text="true">L</span></span><span data-offset-key="efrur-0-0"><span data-text="true">isten to others’ opinions and contributions.</span></span></div>
- <div class="public-DraftStyleDefault-block public-DraftStyleDefault-ltr" data-offset-key="bebf-0-0"><span data-offset-key="5ahc5-0-0"><span data-text="true">Actively engage in collaborative work.</span></span></div>

# 4.Design documents and project plans

<span data-offset-key="b0000-0-0"><span data-text="true">In the pre-production phase at the start of the project, design documents are created to help define and scope what you are going to create. These documents include: </span></span>

- <div class="public-DraftStyleDefault-block public-DraftStyleDefault-ltr" data-offset-key="2opac-0-0"><span data-offset-key="2opac-0-0"><span data-text="true">Game (or Experience) Design Documents (GDDs)</span></span></div>
- <div class="public-DraftStyleDefault-block public-DraftStyleDefault-ltr" data-offset-key="e0n3s-0-0"><span data-offset-key="e0n3s-0-0"><span data-text="true">Target user personas</span></span></div>
- <div class="public-DraftStyleDefault-block public-DraftStyleDefault-ltr" data-offset-key="8g1mk-0-0"><span data-offset-key="8g1mk-0-0"><span data-text="true">Project charters</span></span></div>
- <div class="public-DraftStyleDefault-block public-DraftStyleDefault-ltr" data-offset-key="8933d-0-0"><span data-offset-key="8933d-0-0"><span data-text="true">Technical specifications</span></span></div>

#### <span data-offset-key="uu2c-0-0"><span data-text="true">Design documents</span></span>

<div id="bkmrk-design-documents-con"><div data-offset-key="b7a76-0-0">  
</div><div data-offset-key="b7a76-0-0">  
</div><div class="" data-block="true" data-editor="editorBody_3" data-offset-key="b7a76-0-0"><div class="public-DraftStyleDefault-block public-DraftStyleDefault-ltr" data-offset-key="b7a76-0-0"><span data-offset-key="b7a76-0-0"><span data-text="true">Design documents contain the blueprint for your project. They include:</span></span></div></div></div>- <div class="public-DraftStyleDefault-block public-DraftStyleDefault-ltr" data-offset-key="i3gl-0-0"><span data-offset-key="i3gl-0-0"><span data-text="true">High level overviews; for example, an overall project vision in the Game (or Experience) Design Document</span></span></div>
- <div class="public-DraftStyleDefault-block public-DraftStyleDefault-ltr" data-offset-key="i3gl-0-0"><span data-offset-key="pbst-0-0"><span data-text="true">Requirements and standards for particular pipelines in the project</span></span></div>
- <div class="public-DraftStyleDefault-block public-DraftStyleDefault-ltr" data-offset-key="i3gl-0-0"><span data-offset-key="sn4u-0-0"><span data-text="true">Detailed design specifications for particular features</span></span></div>


<div id="bkmrk-%C2%A0in-your-high-level-"><div class="" data-block="true" data-editor="editorBody_3" data-offset-key="2sohm-0-0"><div class="public-DraftStyleDefault-block public-DraftStyleDefault-ltr" data-offset-key="2sohm-0-0"><span data-offset-key="2sohm-0-0"><span data-text="true"> In your high level design document, you should identify:</span></span></div></div></div>- <div class="public-DraftStyleDefault-block public-DraftStyleDefault-ltr" data-offset-key="6d3a8-0-0"><span data-offset-key="6d3a8-0-0"><span data-text="true">The goal and purpose for the project</span></span></div>
- <div class="public-DraftStyleDefault-block public-DraftStyleDefault-ltr" data-offset-key="6d3a8-0-0"><span data-offset-key="97fsp-0-0"><span data-text="true">The intended users and audience</span></span></div>
- <div class="public-DraftStyleDefault-block public-DraftStyleDefault-ltr" data-offset-key="6d3a8-0-0"><span data-offset-key="8u9ia-0-0"><span data-text="true">Key features of the project</span></span></div>
- <div class="public-DraftStyleDefault-block public-DraftStyleDefault-ltr" data-offset-key="6d3a8-0-0"><span data-offset-key="avept-0-0"><span data-text="true">The final form of delivery</span></span></div>


<div id="bkmrk-a-design-document-ca"><div><div><div class="" data-block="true" data-editor="editorBody_3" data-offset-key="7f67s-0-0"><div class="public-DraftStyleDefault-block public-DraftStyleDefault-ltr" data-offset-key="7f67s-0-0"><span data-offset-key="7f67s-0-0"><span data-text="true">A design document can include diagrams, flow charts, sketches, inspirational images from similar products, and reference images to capture the intended look and feel of the product. </span></span></div></div><div data-offset-key="fck9o-0-0">  
</div><div data-offset-key="fck9o-0-0">  
</div><div class="" data-block="true" data-editor="editorBody_3" data-offset-key="fck9o-0-0"><div class="public-DraftStyleDefault-block public-DraftStyleDefault-ltr" data-offset-key="fck9o-0-0"><span data-offset-key="fck9o-0-0"><span data-text="true">If you don't already have a design document, you can download a PDF version of the design document template from the materials section or you can make a </span></span>[<span data-offset-key="fck9o-1-0" style="text-decoration: underline;"><span data-text="true">Google document copy</span></span>](https://docs.google.com/document/u/1/d/10lPZ95ViLsOLUKEqLehxSorp7qNQQs-ulBgQq7R5Uws/copy)<span data-offset-key="fck9o-2-0"><span data-text="true">.</span></span></div></div><div data-offset-key="97ltm-0-0">  
</div></div></div></div>[![image.png](https://library.naruzkurai.tk/uploads/images/gallery/2023-05/scaled-1680-/TtcrKP23KoLkzU4B-image.png)](https://library.naruzkurai.tk/uploads/images/gallery/2023-05/TtcrKP23KoLkzU4B-image.png)

#### <span data-offset-key="2make-0-0"><span data-text="true">Project charters</span></span>

<div id="bkmrk-once-the-design-docu"><div data-offset-key="a17vd-0-0">  
</div><div data-offset-key="a17vd-0-0">  
</div><div class="" data-block="true" data-editor="editorBody_3" data-offset-key="a17vd-0-0"><div class="public-DraftStyleDefault-block public-DraftStyleDefault-ltr" data-offset-key="a17vd-0-0"><span data-offset-key="a17vd-0-0"><span data-text="true">Once the design document has been approved and the project is greenlit to be produced, a </span></span><span data-offset-key="a17vd-0-1" style="font-weight: bold;"><span data-text="true">project charter</span></span><span data-offset-key="a17vd-0-2"><span data-text="true"> is useful, especially when you are working in a team. This is a formal document that describes the entire project, including the project's objectives, how it will be carried out, and who the stakeholders are. The project charter is used in both the pre-production and production phases. </span></span></div></div><div data-offset-key="4iik0-0-0">  
</div><div data-offset-key="4iik0-0-0">  
</div><div class="" data-block="true" data-editor="editorBody_3" data-offset-key="4iik0-0-0"><div class="public-DraftStyleDefault-block public-DraftStyleDefault-ltr" data-offset-key="4iik0-0-0"><span data-offset-key="4iik0-0-0"><span data-text="true">You can download a PDF version of an example project charter in the materials section or make a </span></span>[<span data-offset-key="4iik0-1-0" style="text-decoration: underline;"><span data-text="true">Google document copy</span></span>](https://docs.google.com/document/u/1/d/1h6R70TV3l4yV-l4o_BmBbiZiR3n6HolyD6r1AgP7mIY/copy)<span data-offset-key="4iik0-2-0"><span data-text="true">. </span></span></div></div><div data-offset-key="fu7pk-0-0">  
</div><div data-offset-key="fu7pk-0-0">  
</div><div class="" data-block="true" data-editor="editorBody_3" data-offset-key="fu7pk-0-0"><div class="public-DraftStyleDefault-block public-DraftStyleDefault-ltr" data-offset-key="fu7pk-0-0"><span data-offset-key="fu7pk-0-0"><span data-text="true">The project charter usually includes:</span></span></div></div></div><div data-offset-key="6d2id-0-0" id="bkmrk--1"></div>- <div class="public-DraftStyleDefault-block public-DraftStyleDefault-ltr" data-offset-key="6d2id-0-0"><span data-offset-key="6d2id-0-0"><span data-text="true">Reasons for the project</span></span></div>
- <div class="public-DraftStyleDefault-block public-DraftStyleDefault-ltr" data-offset-key="6d2id-0-0"><span data-offset-key="eihh4-0-0"><span data-text="true">Objectives and constraints of the project</span></span></div>
- <div class="public-DraftStyleDefault-block public-DraftStyleDefault-ltr" data-offset-key="6d2id-0-0"><span data-offset-key="avt7u-0-0"><span data-text="true">Who the main stakeholders are</span></span></div>
- <div class="public-DraftStyleDefault-block public-DraftStyleDefault-ltr" data-offset-key="6d2id-0-0"><span data-offset-key="916ej-0-0"><span data-text="true">Risks identified</span></span></div>
- <div class="public-DraftStyleDefault-block public-DraftStyleDefault-ltr" data-offset-key="6d2id-0-0"><span data-offset-key="bgp7d-0-0"><span data-text="true">Benefits of the project</span></span></div>
- <div class="public-DraftStyleDefault-block public-DraftStyleDefault-ltr" data-offset-key="6d2id-0-0"><span data-offset-key="5v23u-0-0"><span data-text="true">General overview of the budger</span></span></div>


<div id="bkmrk--2"></div>#### <span data-offset-key="2a7pt-0-0"><span data-text="true">Additional documentation</span></span>

<div id="bkmrk-depending-on-your-pr"><div data-offset-key="1v4b5-0-0">  
</div><div data-offset-key="1v4b5-0-0">  
</div><div class="" data-block="true" data-editor="editorBody_3" data-offset-key="1v4b5-0-0"><div class="public-DraftStyleDefault-block public-DraftStyleDefault-ltr" data-offset-key="1v4b5-0-0"><span data-offset-key="1v4b5-0-0"><span data-text="true">Depending on your project, you may need to create additional supporting documentation during the pre-production phase to help you scope and plan for production. You can iterate on these documents throughout pre-production and production, as needed.</span></span></div></div><div data-offset-key="1neq2-0-0">  
</div><div data-offset-key="1neq2-0-0">  
</div><div class="" data-block="true" data-editor="editorBody_3" data-offset-key="1neq2-0-0"><div class="public-DraftStyleDefault-block public-DraftStyleDefault-ltr" data-offset-key="1neq2-0-0"><span data-offset-key="1neq2-0-0"><span data-text="true">These include: </span></span></div></div></div><div data-offset-key="atftv-0-0" id="bkmrk--3"></div>- <div class="public-DraftStyleDefault-block public-DraftStyleDefault-ltr" data-offset-key="atftv-0-0"><span data-offset-key="atftv-0-0" style="font-weight: bold;"><span data-text="true">Technical documentation:</span></span><span data-offset-key="atftv-0-1"><span data-text="true"> This includes documents that specify the architecture and functionality of the technical parts of a project.</span></span></div>
- <div class="public-DraftStyleDefault-block public-DraftStyleDefault-ltr" data-offset-key="atftv-0-0"><span data-offset-key="f70sc-0-0" style="font-weight: bold;"><span data-text="true">Meeting notes:</span></span><span data-offset-key="f70sc-0-1"><span data-text="true"> If you’re working in a team, it’s useful to capture meeting notes to record what the whole team is working on, dependencies, progress, and blockers.</span></span></div>
- <div class="public-DraftStyleDefault-block public-DraftStyleDefault-ltr" data-offset-key="atftv-0-0"><span data-offset-key="92ha3-0-0" style="font-weight: bold;"><span data-text="true">Proposal or pitch document:</span></span><span data-offset-key="92ha3-0-1"><span data-text="true"> If you need to get approval from your company, or if you are asking investors to fund your project, a formal proposal or pitch document is recommended.</span></span></div>

# 5.Managing projects and tracking progress

<div id="bkmrk-once-you-have-your-p"><div class="" data-block="true" data-editor="editorBody_4" data-offset-key="b0000-0-0"><div class="public-DraftStyleDefault-block public-DraftStyleDefault-ltr" data-offset-key="b0000-0-0"><span data-offset-key="b0000-0-0"><span data-text="true">Once you have your project clearly scoped out, it is time to start planning how to manage a project by planning appropriate schedules and managing a </span></span><span data-offset-key="b0000-0-1" style="font-weight: bold;"><span data-text="true">project plan</span></span><span data-offset-key="b0000-0-2"><span data-text="true">. While the project plan is usually created in pre-production, it is used and iterated upon throughout the production phase to track the project's progress. </span></span></div></div><div data-offset-key="dhi6j-0-0"></div><div class="" data-block="true" data-editor="editorBody_4" data-offset-key="dhi6j-0-0"><div class="public-DraftStyleDefault-block public-DraftStyleDefault-ltr" data-offset-key="dhi6j-0-0"><span data-offset-key="dhi6j-0-0"><span data-text="true">The project plan takes the elements identified in the design document and project charter and sets specific tasks and deliverable dates. The producer or project manager will often create this plan and update it as necessary when changes need to be made. They will also create a </span></span><span data-offset-key="dhi6j-0-1" style="font-weight: bold;"><span data-text="true">project tracker</span></span><span data-offset-key="dhi6j-0-2"><span data-text="true">, which can be part of the plan itself or created separately, to measure progress against the defined tasks and required deliverables. If you don’t create and follow a project plan, the result is usually scope creep — the continuous adding of new ideas and features to your plan — which can lead to the project failing, being late, or going over budget. </span></span></div></div><div data-offset-key="18m8b-0-0">  
</div><div data-offset-key="18m8b-0-0">  
</div><div class="" data-block="true" data-editor="editorBody_4" data-offset-key="18m8b-0-0"><div class="public-DraftStyleDefault-block public-DraftStyleDefault-ltr" data-offset-key="18m8b-0-0"><span data-offset-key="18m8b-0-0"><span data-text="true">Some guidelines to successfully track projects, for both individuals and teams, include:</span></span></div></div></div><div data-offset-key="bvon2-0-0" id="bkmrk-">  
</div>- <div class="public-DraftStyleDefault-block public-DraftStyleDefault-ltr" data-offset-key="bvon2-0-0"><span data-offset-key="bvon2-0-0"><span data-text="true">Identify the necessary project steps.</span></span></div>
- <div class="public-DraftStyleDefault-block public-DraftStyleDefault-ltr" data-offset-key="bvon2-0-0"><span data-offset-key="fh8e2-0-0"><span data-text="true">If working in a team, identify and assign specific project roles and responsibilities.</span></span></div>
- <div class="public-DraftStyleDefault-block public-DraftStyleDefault-ltr" data-offset-key="bvon2-0-0"><span data-offset-key="4ssfe-0-0"><span data-text="true">Create a timeline with specific deliverables and due dates.</span></span></div>
- <div class="public-DraftStyleDefault-block public-DraftStyleDefault-ltr" data-offset-key="bvon2-0-0"><span data-offset-key="e9tva-0-0"><span data-text="true">Identify common problems and issues in project management, such as scope creep and overly ambitious design plans, and tight time constraints.</span></span></div>
- <div class="public-DraftStyleDefault-block public-DraftStyleDefault-ltr" data-offset-key="bvon2-0-0"><span data-offset-key="34s9f-0-0"><span data-text="true">Determine when the completed project is due. </span></span></div>
- <div class="public-DraftStyleDefault-block public-DraftStyleDefault-ltr" data-offset-key="bvon2-0-0"><span data-offset-key="cthau-0-0"><span data-text="true">Set due dates for each smaller piece of the project that will build to the overall project.</span></span></div>
- <div class="public-DraftStyleDefault-block public-DraftStyleDefault-ltr" data-offset-key="bvon2-0-0"><span data-offset-key="bncjg-0-0"><span data-text="true">Create reasonable time frames for each project phase. </span></span></div>
- <div class="public-DraftStyleDefault-block public-DraftStyleDefault-ltr" data-offset-key="bvon2-0-0"><span data-offset-key="97j6v-0-0"><span data-text="true">If working in a team, designate task owners for each task on the list.</span></span></div>


#### <span data-offset-key="64me2-0-0"><span data-text="true">Creating projects for clients</span></span>

<div id="bkmrk-if-you-are-creating-"><div data-offset-key="6nped-0-0">  
</div><div class="" data-block="true" data-editor="editorBody_4" data-offset-key="6nped-0-0"><div class="public-DraftStyleDefault-block public-DraftStyleDefault-ltr" data-offset-key="6nped-0-0"><span data-offset-key="6nped-0-0"><span data-text="true">If you are creating a project for a client, there are some additional considerations that can help support effective project management: </span></span></div></div></div><div data-offset-key="5m11q-0-0" id="bkmrk--1">  
</div><div data-offset-key="5m11q-0-0" id="bkmrk--2">  
</div>- <div class="public-DraftStyleDefault-block public-DraftStyleDefault-ltr" data-offset-key="5m11q-0-0"><span data-offset-key="5m11q-0-0"><span data-text="true">Identify clear project roles — this includes identifying the person who serves as the liaison between the client and the group, and key stakeholders for different elements of the project. </span></span></div>
- <div class="public-DraftStyleDefault-block public-DraftStyleDefault-ltr" data-offset-key="5m11q-0-0"><span data-offset-key="2lsgc-0-0"><span data-text="true">Understand and clarify client expectations.</span></span></div>
- <div class="public-DraftStyleDefault-block public-DraftStyleDefault-ltr" data-offset-key="5m11q-0-0"><span data-offset-key="9s485-0-0"><span data-text="true">Plan to support clear communication with the client — identify the ways you will communicate with your client and any online collaborative tools needed to review the project with their client.</span></span></div>

# 6.Exercise: Identify tools to support your project management and tracking

<div class="" data-block="true" data-editor="editorBody_5" data-offset-key="b0000-0-0" id="bkmrk-there-are-a-variety-"><div class="" data-block="true" data-editor="editorBody_5" data-offset-key="b0000-0-0"><div class="public-DraftStyleDefault-block public-DraftStyleDefault-ltr" data-offset-key="b0000-0-0"><span data-offset-key="b0000-0-0"><span data-text="true">There are a variety of project management tools that can help you to identify and plan all the steps of a project . Products like </span></span>[<span data-offset-key="b0000-1-0" style="text-decoration: underline;"><span data-text="true">Trello</span></span>](https://trello.com/)<span data-offset-key="b0000-2-0"><span data-text="true">, </span></span>[<span data-offset-key="b0000-3-0" style="text-decoration: underline;"><span data-text="true">Favro</span></span>](https://www.favro.com/)<span data-offset-key="b0000-4-0"><span data-text="true">, </span></span>[<span data-offset-key="b0000-5-0" style="text-decoration: underline;"><span data-text="true">Airtable</span></span>](https://airtable.com/)<span data-offset-key="b0000-6-0"><span data-text="true">, </span></span>[<span data-offset-key="b0000-7-0" style="text-decoration: underline;"><span data-text="true">Monday.com</span></span>](https://monday.com/)<span data-offset-key="b0000-8-0"><span data-text="true">, </span></span>[<span data-offset-key="b0000-9-0" style="text-decoration: underline;"><span data-text="true">Google Apps</span></span>](https://workspace.google.com/)<span data-offset-key="b0000-10-0"><span data-text="true">, </span></span>[<span data-offset-key="b0000-11-0" style="text-decoration: underline;"><span data-text="true">Jira</span></span>](https://www.atlassian.com/software/jira)<span data-offset-key="b0000-12-0"><span data-text="true">, and </span></span>[<span data-offset-key="b0000-13-0" style="text-decoration: underline;"><span data-text="true">GitHub</span></span>](https://github.com/)<span data-offset-key="b0000-14-0"><span data-text="true"> offer various features to support individuals and teams to plan and track their workstreams so that they execute and deliver on time. Many of these project management tools have templates that you can re-purpose to your particular project needs. </span></span></div><div class="public-DraftStyleDefault-block public-DraftStyleDefault-ltr" data-offset-key="b0000-0-0">  
</div></div></div>[![image.png](https://library.naruzkurai.tk/uploads/images/gallery/2023-05/scaled-1680-/mIbK70GEn9wqos5X-image.png)](https://library.naruzkurai.tk/uploads/images/gallery/2023-05/mIbK70GEn9wqos5X-image.png)

<div class="" data-block="true" data-editor="editorBody_5" data-offset-key="c5vhe-0-0" id="bkmrk-if-you-don%E2%80%99t-already"><div class="public-DraftStyleDefault-block public-DraftStyleDefault-ltr" data-offset-key="c5vhe-0-0"><span data-offset-key="c5vhe-0-0"><span data-text="true"> If you don’t already use one of these tools, take some time to investigate the options available to you and identify a tool to trial for your next project.</span></span></div></div><div data-offset-key="1titl-0-0" id="bkmrk--1">  
</div><div data-offset-key="1titl-0-0" id="bkmrk--2">  
</div><div class="" data-block="true" data-editor="editorBody_5" data-offset-key="1titl-0-0" id="bkmrk-if-you-do-already-us"><div class="public-DraftStyleDefault-block public-DraftStyleDefault-ltr" data-offset-key="1titl-0-0"><span data-offset-key="1titl-0-0"><span data-text="true">If you do already use one of these tools but it’s not quite right for you, this is a great opportunity to investigate whether there are new options or features available that might better support you elsewhere.</span></span></div></div><div data-offset-key="6qhem-0-0" id="bkmrk--3">  
</div><div data-offset-key="6qhem-0-0" id="bkmrk--4">  
</div><div class="public-DraftStyleDefault-block public-DraftStyleDefault-ltr" data-offset-key="6qhem-0-0" id="bkmrk-share-your-experienc"><span data-offset-key="6qhem-0-0"><span data-text="true">Share your experience</span></span></div><div data-offset-key="991oj-0-0" id="bkmrk--5">  
</div><div data-offset-key="991oj-0-0" id="bkmrk--6">  
</div><div class="" data-block="true" data-editor="editorBody_5" data-offset-key="991oj-0-0" id="bkmrk-if-you%E2%80%99ve-had-a-grea"><div class="public-DraftStyleDefault-block public-DraftStyleDefault-ltr" data-offset-key="991oj-0-0"><span data-offset-key="991oj-0-0"><span data-text="true">If you’ve had a great experience with a particular tool, or discovered a really useful tool in your research, share your insights in the comments to support other learners!</span></span></div></div>

# 7.Preparing to publish

<div id="bkmrk-in-the-post-producti"><div><div class="" data-block="true" data-editor="editorBody_6" data-offset-key="b0000-0-0"><div class="public-DraftStyleDefault-block public-DraftStyleDefault-ltr" data-offset-key="b0000-0-0"><span data-offset-key="b0000-0-0"><span data-text="true">In the post-production phase, you’ll prepare to publish your project. Your project plan should account for quality assurance (QA) testing, content editing and revision, bug fixing, and final polishing of the deliverables. </span></span></div><div class="public-DraftStyleDefault-block public-DraftStyleDefault-ltr" data-offset-key="b0000-0-0"></div></div><div class="" data-block="true" data-editor="editorBody_6" data-offset-key="askv2-0-0"><div class="public-DraftStyleDefault-block public-DraftStyleDefault-ltr" data-offset-key="askv2-0-0"><span data-offset-key="askv2-0-0"><span data-text="true">Let’s consider quality assurance testing in a little more detail.</span></span></div></div></div></div>#### <span data-offset-key="dfj39-0-0"><span data-text="true">Quality assurance testing</span></span>

<div id="bkmrk-during-the-qa-testin"><div class="" data-block="true" data-editor="editorBody_6" data-offset-key="8i56r-0-0"><div class="public-DraftStyleDefault-block public-DraftStyleDefault-ltr" data-offset-key="8i56r-0-0"><span data-offset-key="8i56r-0-0"><span data-text="true">During the QA testing process, there are two important project management considerations: QA testing scripts and bug reporting processes. </span></span></div><div class="public-DraftStyleDefault-block public-DraftStyleDefault-ltr" data-offset-key="8i56r-0-0"></div></div><div class="" data-block="true" data-editor="editorBody_6" data-offset-key="rgh3-0-0"><div class="public-DraftStyleDefault-block public-DraftStyleDefault-ltr" data-offset-key="rgh3-0-0"><span data-offset-key="rgh3-0-0" style="font-weight: bold;"><span data-text="true">Test scripts </span></span><span data-offset-key="rgh3-0-1"><span data-text="true">A QA test script is a series of steps for a tester to follow and record their observations. These scripts are usually created before formal testing starts, and are used to evaluate the product against specific project requirements and use cases. They may also be used to test the team’s assumptions about the user experience of the product.</span></span></div></div><div data-offset-key="ci1r5-0-0">  
</div><div class="" data-block="true" data-editor="editorBody_6" data-offset-key="ci1r5-0-0"><div class="public-DraftStyleDefault-block public-DraftStyleDefault-ltr" data-offset-key="ci1r5-0-0"><span data-offset-key="ci1r5-0-0" style="font-weight: bold;"><span data-text="true">Bug report tracking </span></span><span data-offset-key="ci1r5-0-1"><span data-text="true">Bug tracking and resolution is a vital part of polishing the product for delivery. The tools used to track bug reports vary — </span></span>[<span data-offset-key="ci1r5-1-0"><span data-text="true">Jira</span></span>](https://training.atlassian.com/free-training-catalog)<span data-offset-key="ci1r5-2-0"><span data-text="true"> and</span></span>[<span data-offset-key="ci1r5-3-0"><span data-text="true"> Github</span></span>](https://guides.github.com/features/issues/)<span data-offset-key="ci1r5-4-0"><span data-text="true"> are popular choices, but many individuals and teams use a spreadsheet. </span></span></div></div><div data-offset-key="lsq2-0-0"></div><div class="" data-block="true" data-editor="editorBody_6" data-offset-key="lsq2-0-0"><div class="public-DraftStyleDefault-block public-DraftStyleDefault-ltr" data-offset-key="lsq2-0-0"><span data-offset-key="lsq2-0-0"><span data-text="true">Typical bug reports include: </span></span></div></div></div>- <div class="public-DraftStyleDefault-block public-DraftStyleDefault-ltr" data-offset-key="e0fs8-0-0"><span data-offset-key="e0fs8-0-0" style="font-weight: bold;"><span data-text="true">Title / brief summary:</span></span><span data-offset-key="e0fs8-0-1"><span data-text="true"> A descriptive title for the bug.</span></span></div>
- <div class="public-DraftStyleDefault-block public-DraftStyleDefault-ltr" data-offset-key="e0fs8-0-0"><span data-offset-key="7hgm1-0-0" style="font-weight: bold;"><span data-text="true">Identified frequency</span></span><span data-offset-key="7hgm1-0-1"><span data-text="true">: How often does this bug occur (every time, most times, randomly, rarely)?</span></span></div>
- <div class="public-DraftStyleDefault-block public-DraftStyleDefault-ltr" data-offset-key="e0fs8-0-0"><span data-offset-key="am8ba-0-0" style="font-weight: bold;"><span data-text="true">Reproduction steps</span></span><span data-offset-key="am8ba-0-1"><span data-text="true">: Precise steps on how to reproduce the bug. This should be detailed enough that a developer can recreate the bug themselves without any additional information.</span></span></div>
- <div class="public-DraftStyleDefault-block public-DraftStyleDefault-ltr" data-offset-key="e0fs8-0-0"><span data-offset-key="9sjoo-0-0" style="font-weight: bold;"><span data-text="true">Detailed description: </span></span><span data-offset-key="9sjoo-0-1"><span data-text="true"> A more detailed summary of the bug and its impact on user experience.</span></span></div>
- <div class="public-DraftStyleDefault-block public-DraftStyleDefault-ltr" data-offset-key="e0fs8-0-0"><span data-offset-key="a3q15-0-0" style="font-weight: bold;"><span data-text="true">Any other observations</span></span><span data-offset-key="a3q15-0-1"><span data-text="true">: These could include thoughts on what may be causing the bug and other relevant details (for example, “error occurs inconsistently, but more frequently at night than during the day”).</span></span></div>


<div id="bkmrk-if-you-want-to-learn"><div class="" data-block="true" data-editor="editorBody_6" data-offset-key="dqpv3-0-0"><div class="public-DraftStyleDefault-block public-DraftStyleDefault-ltr" data-offset-key="dqpv3-0-0"><span data-offset-key="dqpv3-0-0"><span data-text="true"> If you want to learn more about bug reports, review </span></span>[<span data-offset-key="dqpv3-1-0"><span data-text="true">The Art Of The Bug Report at the Ministry of Testing</span></span>](https://www.ministryoftesting.com/dojo/lessons/the-art-of-the-bug-report)<span data-offset-key="dqpv3-2-0"><span data-text="true">.</span></span></div></div></div>

# 8.Releasing your project

<div class="" data-block="true" data-editor="editorBody_7" data-offset-key="3bvu1-0-0" id="bkmrk-once-your-project-ha"><div class="public-DraftStyleDefault-block public-DraftStyleDefault-ltr" data-offset-key="3bvu1-0-0"><span data-offset-key="3bvu1-0-0"><span data-text="true">Once your project has been tested, fixed, and validated, you are ready to publish. Your project plan should account for when and where you are publishing your product — ideally, you’ve been sticking to your deliverable date, and you are publishing your project on the date you originally identified.</span></span></div></div><div data-offset-key="blvm0-0-0" id="bkmrk-">  
</div><div data-offset-key="blvm0-0-0" id="bkmrk--1">  
</div><div class="" data-block="true" data-editor="editorBody_7" data-offset-key="blvm0-0-0" id="bkmrk-even-if-you-don%E2%80%99t-hi"><div class="public-DraftStyleDefault-block public-DraftStyleDefault-ltr" data-offset-key="blvm0-0-0"><span data-offset-key="blvm0-0-0"><span data-text="true">Even if you don’t hit the exact date you identified in pre-production, by following a clear project plan and making adjustments along the way, you should be within a reasonable range of your original release date.</span></span></div></div><div data-offset-key="22lbv-0-0" id="bkmrk--2">  
</div><div data-offset-key="22lbv-0-0" id="bkmrk--3">  
</div><div class="" data-block="true" data-editor="editorBody_7" data-offset-key="22lbv-0-0" id="bkmrk--4"><div class="public-DraftStyleDefault-block public-DraftStyleDefault-ltr" data-offset-key="22lbv-0-0"></div></div>

# 9.Operations activities and retrospectives

#### <span data-offset-key="b0000-0-0"><span data-text="true">Operations activities</span></span>

<div id="bkmrk-the-final-phase-of-t"><div><div data-offset-key="2vqf7-0-0">  
</div><div data-offset-key="2vqf7-0-0">  
</div><div class="" data-block="true" data-editor="editorBody_8" data-offset-key="2vqf7-0-0"><div class="public-DraftStyleDefault-block public-DraftStyleDefault-ltr" data-offset-key="2vqf7-0-0"><span data-offset-key="2vqf7-0-0"><span data-text="true">The final phase of the production cycle, operations, includes work typically done after a product has been released to keep it running. Although operations activities generally don’t start until the release date, they should be identified and planned during pre-production. These activities include ongoing sales, monetization, updates, and continued maintenance.</span></span></div></div><div data-offset-key="m568-0-0"></div></div></div>#### <span data-offset-key="m568-0-0"><span data-text="true">Project retrospectives</span></span>

<div id="bkmrk-finally%2C-a-retrospec"><div data-offset-key="fhpfh-0-0">  
</div><div class="" data-block="true" data-editor="editorBody_8" data-offset-key="fhpfh-0-0"><div class="public-DraftStyleDefault-block public-DraftStyleDefault-ltr" data-offset-key="fhpfh-0-0"><span data-offset-key="fhpfh-0-0"><span data-text="true">Finally, a retrospective should be planned once the project is launched so that you (and your team, if there was one) can reflect back on the design and development process. Retrospectives help you identify areas that went well, areas that didn’t go well, and ways to improve for future projects. </span></span></div></div><div data-offset-key="9bpuo-0-0"></div><div class="" data-block="true" data-editor="editorBody_8" data-offset-key="9bpuo-0-0"><div class="public-DraftStyleDefault-block public-DraftStyleDefault-ltr" data-offset-key="9bpuo-0-0"><span data-offset-key="9bpuo-0-0"><span data-text="true">One simple approach to conducting a retrospective can be to make a chart with three columns and identify things that you think you should:</span></span></div></div></div>- <div class="public-DraftStyleDefault-block public-DraftStyleDefault-ltr" data-offset-key="14i64-0-0"><span data-offset-key="14i64-0-0"><span data-text="true">Start doing</span></span></div>
- <div class="public-DraftStyleDefault-block public-DraftStyleDefault-ltr" data-offset-key="14i64-0-0"><span data-offset-key="ego9s-0-0"><span data-text="true">Stop doing</span></span></div>
- <div class="public-DraftStyleDefault-block public-DraftStyleDefault-ltr" data-offset-key="14i64-0-0"><span data-offset-key="44fep-0-0"><span data-text="true">Continue doing </span></span></div>


<div id="bkmrk-there-are-lots-of-to"><div class="" data-block="true" data-editor="editorBody_8" data-offset-key="fitmg-0-0"><div class="public-DraftStyleDefault-block public-DraftStyleDefault-ltr" data-offset-key="fitmg-0-0"></div><div class="public-DraftStyleDefault-block public-DraftStyleDefault-ltr" data-offset-key="fitmg-0-0"><span data-offset-key="fitmg-0-0"><span data-text="true">There are lots of tools and frameworks available for organizing and facilitating retrospectives if you’d like to find something a little different that best suits your particular project.</span></span></div></div></div>

# 10.Summary

<div class="" data-block="true" data-editor="editorBody_9" data-offset-key="b0000-0-0" id="bkmrk-in-this-tutorial%2C-yo"><div class="public-DraftStyleDefault-block public-DraftStyleDefault-ltr" data-offset-key="b0000-0-0"><span data-offset-key="b0000-0-0"><span data-text="true">In this tutorial, you’ve explored the basics of project management. These are applicable to any project you work on: big or small, for real-time experience creation, or for any other kind of project!</span></span></div></div><div data-offset-key="66frh-0-0" id="bkmrk-"></div><div class="" data-block="true" data-editor="editorBody_9" data-offset-key="66frh-0-0" id="bkmrk-when-you-start-your-"><div class="public-DraftStyleDefault-block public-DraftStyleDefault-ltr" data-offset-key="66frh-0-0"><span data-offset-key="66frh-0-0"><span data-text="true">When you start your next project, use these recommendations to help you stay on track and deliver on time. Why not set up some documentation and a simple project plan or tracker for your next portfolio project?</span></span></div></div>

# Unit 2

https://learn.unity.com/tutorial/unit-2-introduction?uv=2021.3&amp;pathwayId=5f7e17e1edbc2a5ec21a20af&amp;missionId=5f71fe63edbc2a00200e9de0&amp;projectId=5cdcc312edbc2a24a41671e6#5d1ba822edbc2a002175788d

# Introduction

we will make a top down prototype where you shoot things that come after you, kindof like galiga except in 3d and not at all like galiga XD

# Lesson 2.1 - Player Positioning

<div class="section-wrap_33eSsj8g summary-wrap_2K9D41EG" id="bkmrk-summary-overview%3A-yo"><div class="section-title_sAxfYbvs">Summary</div><div class="summary"><div class="body-wrap_176taP6A render-only_3LFn_jOO architecture_37OsW6cu"><div><div class="DraftEditor-root"><div class="DraftEditor-editorContainer"><span data-offset-key="b0000-0-0" style="font-weight: bold;"><span data-text="true">Overview: </span></span></div><div class="DraftEditor-editorContainer"><div class="" data-block="true" data-editor="editorDescription" data-offset-key="7u2u3-0-0"><div class="public-DraftStyleDefault-block public-DraftStyleDefault-ltr" data-offset-key="7u2u3-0-0"><span data-offset-key="7u2u3-0-0"><span data-text="true">You will begin this unit by creating a new project for your second Prototype and getting basic player movement working. You will first choose which character you would like, which types of animals you would like to interact with, and which food you would like to feed those animals. You will give the player basic side-to-side movement just like you did in Prototype 1, but then you will use if-then statements to keep the Player in bounds. </span></span></div></div><div data-offset-key="6jqsd-0-0">  
</div><div class="" data-block="true" data-editor="editorDescription" data-offset-key="6jqsd-0-0"><div class="public-DraftStyleDefault-block public-DraftStyleDefault-ltr" data-offset-key="6jqsd-0-0"><span data-offset-key="6jqsd-0-0" style="font-weight: bold;"><span data-text="true">Project Outcome:</span></span></div></div><div data-offset-key="c9o34-0-0">  
</div><div class="" data-block="true" data-editor="editorDescription" data-offset-key="c9o34-0-0"><div class="public-DraftStyleDefault-block public-DraftStyleDefault-ltr" data-offset-key="c9o34-0-0"><span data-offset-key="c9o34-0-0"><span data-text="true">The player will be able to move left and right on the screen based on the user’s left and right key presses, but will not be able to leave the play area on either side.  
</span></span></div><div class="public-DraftStyleDefault-block public-DraftStyleDefault-ltr" data-offset-key="c9o34-0-0">  
</div><div class="public-DraftStyleDefault-block public-DraftStyleDefault-ltr" data-offset-key="c9o34-0-0"><span data-offset-key="c9o34-0-0"><span data-text="true">**Materials**  
[<div class="material-icon_2Si7HD9p ifont ifont-lrn_icon_download">  
</div>Prototype 2 - Starter Files.zip  
  ](https://connect-prd-cdn.unity.com/20210507/bfd26de3-a68a-4a16-8cf6-8eacf2bb7f75/Prototype%202%20-%20Starter%20Files.zip)<span data-offset-key="c9o34-0-0"><span data-text="true">Select your Unity version</span></span>  
</span></span></div><div class="public-DraftStyleDefault-block public-DraftStyleDefault-ltr" data-offset-key="c9o34-0-0"><span data-offset-key="c9o34-0-0"><span data-text="true">2021.1 - 2021.3</span></span></div></div></div></div></div></div></div></div>

# 1.Create a new Project for Prototype 2

- <div class="public-DraftStyleDefault-block public-DraftStyleDefault-ltr" data-offset-key="6ejfl-0-0"><span data-offset-key="6ejfl-0-0"><span data-text="true">Open </span></span><span data-offset-key="6ejfl-0-1" style="font-weight: bold;"><span data-text="true">Unity Hub</span></span><span data-offset-key="6ejfl-0-2"><span data-text="true"> and create an empty “</span></span><span data-offset-key="6ejfl-0-3" style="text-decoration: underline;"><span data-text="true">Prototype 2</span></span><span data-offset-key="6ejfl-0-4"><span data-text="true">” project in your course directory on the correct Unity version. If you forget how to do this, refer to the instructions in </span></span>[<span data-offset-key="6ejfl-1-0" style="text-decoration: underline;"><span data-text="true">Lesson 1.1 - Step 1</span></span>](https://learn.unity.com/tutorial/set-up-your-first-project-in-unity?uv=2018.4&courseId=5cf96c41edbc2a2ca6e8810f&projectId=5caccdfbedbc2a3cef0efe63#5cb7a1acedbc2a10b7261d15)</div>

<div data-offset-key="4qlfs-0-0" id="bkmrk-">  
</div><div data-offset-key="4qlfs-0-0" id="bkmrk--1">  
</div>- <div class="public-DraftStyleDefault-block public-DraftStyleDefault-ltr" data-offset-key="4qlfs-0-0"><span data-offset-key="4qlfs-0-0"><span data-text="true">Click to download the </span></span>[<span data-offset-key="4qlfs-1-0" style="text-decoration: underline;"><span data-text="true">Prototype 2 Starter Files</span></span>](https://connect-prd-cdn.unity.com/20210507/bfd26de3-a68a-4a16-8cf6-8eacf2bb7f75/Prototype%202%20-%20Starter%20Files.zip?_ga=2.29238268.1186801097.1620052249-59568313.1601905412)<span data-offset-key="4qlfs-2-0"><span data-text="true">, </span></span><span data-offset-key="4qlfs-2-1" style="font-weight: bold;"><span data-text="true">extract</span></span><span data-offset-key="4qlfs-2-2"><span data-text="true"> the compressed folder, and then </span></span><span data-offset-key="4qlfs-2-3" style="font-weight: bold;"><span data-text="true">import</span></span><span data-offset-key="4qlfs-2-4"><span data-text="true"> the .unitypackage into your project. If you forget how to do this, refer to the instructions in </span></span>[<span data-offset-key="4qlfs-3-0" style="text-decoration: underline;"><span data-text="true">Lesson 1.1 - Step 2</span></span>](https://learn.unity.com/tutorial/set-up-your-first-project-in-unity?uv=2018.4&courseId=5cf96c41edbc2a2ca6e8810f&projectId=5caccdfbedbc2a3cef0efe63#5cca0230edbc2a635ca5d6d2)</div>

<div data-offset-key="396ab-0-0" id="bkmrk--2">  
</div><div data-offset-key="396ab-0-0" id="bkmrk--3">  
</div>- <div class="public-DraftStyleDefault-block public-DraftStyleDefault-ltr" data-offset-key="396ab-0-0"><span data-offset-key="396ab-0-0"><span data-text="true">From the Project window, open the </span></span><span data-offset-key="396ab-0-1" style="font-weight: bold;"><span data-text="true">Prototype 2 </span></span><span data-offset-key="396ab-0-2"><span data-text="true">scene and </span></span><span data-offset-key="396ab-0-3" style="font-weight: bold;"><span data-text="true">delete</span></span><span data-offset-key="396ab-0-4"><span data-text="true"> the SampleScene </span></span></div>

<div data-offset-key="eivkr-0-0" id="bkmrk--4">  
</div><div data-offset-key="eivkr-0-0" id="bkmrk--5">  
</div>- <div class="public-DraftStyleDefault-block public-DraftStyleDefault-ltr" data-offset-key="eivkr-0-0"><span data-offset-key="eivkr-0-0"><span data-text="true">In the top-right of the Unity Editor, change your </span></span><span data-offset-key="eivkr-0-1" style="font-weight: bold;"><span data-text="true">Layout</span></span><span data-offset-key="eivkr-0-2"><span data-text="true"> from Default to your custom layout</span></span></div>

# 2.Add the 3d assets + first few lines of code

<div id="bkmrk-"></div>1. <div class="public-DraftStyleDefault-block public-DraftStyleDefault-ltr" data-offset-key="5gpep-0-0"><span data-offset-key="5gpep-0-0"><span data-text="true">If you want, drag a different </span></span><span data-offset-key="5gpep-0-1" style="font-weight: bold;"><span data-text="true">material</span></span><span data-offset-key="5gpep-0-2"><span data-text="true"> from </span></span><span data-offset-key="5gpep-0-3" style="font-style: italic;"><span data-text="true">Course Library &gt; Materials</span></span><span data-offset-key="5gpep-0-4"><span data-text="true"> onto the Ground object </span></span></div>
2. <div class="public-DraftStyleDefault-block public-DraftStyleDefault-ltr" data-offset-key="5gpep-0-0"><span data-offset-key="941fa-0-0"><span data-text="true">Drag 1 </span></span><span data-offset-key="941fa-0-1" style="font-weight: bold;"><span data-text="true">Human</span></span><span data-offset-key="941fa-0-2"><span data-text="true">, 3 </span></span><span data-offset-key="941fa-0-3" style="font-weight: bold;"><span data-text="true">Animals</span></span><span data-offset-key="941fa-0-4"><span data-text="true">, and 1 </span></span><span data-offset-key="941fa-0-5" style="font-weight: bold;"><span data-text="true">Food</span></span><span data-offset-key="941fa-0-6"><span data-text="true"> object into the Hierarchy</span></span></div>
3. <div class="public-DraftStyleDefault-block public-DraftStyleDefault-ltr" data-offset-key="5gpep-0-0"><span data-offset-key="78l1o-0-0"><span data-text="true">Rename the character “</span></span><span data-offset-key="78l1o-0-1" style="text-decoration: underline;"><span data-text="true">Player</span></span><span data-offset-key="78l1o-0-2"><span data-text="true">”, then </span></span><span data-offset-key="78l1o-0-3" style="font-weight: bold;"><span data-text="true">reposition</span></span><span data-offset-key="78l1o-0-4"><span data-text="true"> the animals and food so you can see them</span></span></div>
4. <div class="public-DraftStyleDefault-block public-DraftStyleDefault-ltr" data-offset-key="5gpep-0-0"><span data-offset-key="1a4c1-0-0"><span data-text="true">Adjust the XYZ </span></span><span data-offset-key="1a4c1-0-1" style="font-weight: bold;"><span data-text="true">scale</span></span><span data-offset-key="1a4c1-0-2"><span data-text="true"> of the food so you can easily see it from above</span></span></div>


1. - <div class="public-DraftStyleDefault-block public-DraftStyleDefault-ltr" data-offset-key="4cui9-0-0"><span data-offset-key="4cui9-0-0" style="font-weight: bold;"><span data-text="true">Attach</span></span><span data-offset-key="4cui9-0-1"><span data-text="true"> the script to the Player and open it</span></span></div>
    - <div class="public-DraftStyleDefault-block public-DraftStyleDefault-ltr" data-offset-key="4cui9-0-0"><span data-offset-key="2cj96-0-0"><span data-text="true">In your </span></span><span data-offset-key="2cj96-0-1" style="font-weight: bold;"><span data-text="true">Assets</span></span><span data-offset-key="2cj96-0-2"><span data-text="true"> folder, create a “</span></span><span data-offset-key="2cj96-0-3" style="text-decoration: underline;"><span data-text="true">Scripts</span></span><span data-offset-key="2cj96-0-4"><span data-text="true">” folder, and a “</span></span><span data-offset-key="2cj96-0-5" style="text-decoration: underline;"><span data-text="true">PlayerController</span></span><span data-offset-key="2cj96-0-6"><span data-text="true">” script inside</span></span></div>
    - <div class="public-DraftStyleDefault-block public-DraftStyleDefault-ltr" data-offset-key="4cui9-0-0"><span data-offset-key="d4f5o-0-0"><span data-text="true">At the top of PlayerController.cs, declare a new</span></span></div>
    - <div class="public-DraftStyleDefault-block public-DraftStyleDefault-ltr" data-offset-key="4cui9-0-0"><span data-offset-key="d4f5o-0-0"><span data-text="true"> <span data-offset-key="1a4c1-0-2">\[SerializeField</span></span></span><span data-offset-key="d4f5o-0-0"><span data-text="true"><span data-offset-key="1a4c1-0-2">\]</span></span></span></div>
    - <div class="public-DraftStyleDefault-block public-DraftStyleDefault-ltr" data-offset-key="4cui9-0-0"><span data-offset-key="d4f5o-0-1" style="font-weight: bold; font-style: italic;"><span data-text="true">private float horizontalInput</span></span></div>
    - <div class="public-DraftStyleDefault-block public-DraftStyleDefault-ltr" data-offset-key="4cui9-0-0"><span data-offset-key="5q1m4-0-0"><span data-text="true">In </span></span><span data-offset-key="5q1m4-0-1" style="font-weight: bold; font-style: italic;"><span data-text="true">Update()</span></span><span data-offset-key="5q1m4-0-2"><span data-text="true">, set </span></span><span data-offset-key="5q1m4-0-3" style="font-weight: bold; font-style: italic;"><span data-text="true">horizontalInput = Input.GetAxis(“Horizontal”)</span></span><span data-offset-key="5q1m4-0-4"><span data-text="true">, then test to make sure it works in the inspector</span></span></div>
    -

```c#
using UnityEngine;

public class Movement : MonoBehaviour
{
    [SerializeField]
    private float horizontalInput;
    // Start is called before the first frame update
    void Start()
    {
        
    }

    // Update is called once per frame
    void Update()
    {
        horizontalInput = Input.GetAxis("Horizontal");
    }
}
```

## <span class="step-index_3pnc7n2S">4.</span>Move the player left-to-right

- <span data-offset-key="1a4c1-0-2"><span data-text="true">here we can get our input with this basic code, we use \[SerializeField\] for sanitization and allow us to see the value in the inspection panel to make sure we didn't fck up lol</span></span>
- <span data-offset-key="1c7ce-0-0"><span data-text="true">Declare a new </span></span><span data-offset-key="1c7ce-0-1" style="font-weight: bold; font-style: italic;"><span data-text="true">public float speed = 10.0f;</span></span>
- <span data-offset-key="9gnle-0-5" style="font-weight: bold; font-style: italic;"><span data-text="true">here's my code</span></span>

```

using UnityEngine;

public class Movement : MonoBehaviour
{
    [SerializeField]
    private float horizontalInput;
    [SerializeField]
    private float speed = 30.0f;
    // Start is called before the first frame update
    void Start()
    {
        
    }

    // Update is called once per frame
    void Update()
    {
        horizontalInput = Input.GetAxis("Horizontal");
        transform.Translate(Vector3.right * horizontalInput * Time.deltaTime * speed);
    }
}

```

#### <span class="step-index_3pnc7n2S">5+6.</span> Keep the player inbounds

- <div class="public-DraftStyleDefault-block public-DraftStyleDefault-ltr" data-offset-key="di3j9-0-0"><span data-offset-key="di3j9-0-0"><span data-text="true">In </span></span><span data-offset-key="di3j9-0-1" style="font-weight: bold; font-style: italic;"><span data-text="true">Update()</span></span><span data-offset-key="di3j9-0-2"><span data-text="true">, write an</span></span><span data-offset-key="di3j9-0-3" style="font-weight: bold;"><span data-text="true"> if-statement </span></span><span data-offset-key="di3j9-0-4"><span data-text="true">checking if the player’s left X position is </span></span><span data-offset-key="di3j9-0-5" style="font-weight: bold;"><span data-text="true">less than</span></span><span data-offset-key="di3j9-0-6"><span data-text="true"> a certain value</span></span></div>
- <div class="public-DraftStyleDefault-block public-DraftStyleDefault-ltr" data-offset-key="8ub62-0-0"><span data-offset-key="8ub62-0-0"><span data-text="true">In the if-statement, set the player’s position to its current position, but with a </span></span><span data-offset-key="8ub62-0-1" style="font-weight: bold;"><span data-text="true">fixed X location</span></span></div>
- <div class="public-DraftStyleDefault-block public-DraftStyleDefault-ltr" data-offset-key="d1vud-0-0"><span data-offset-key="d1vud-0-0"><span data-text="true">Repeat this process for the </span></span><span data-offset-key="d1vud-0-1" style="font-weight: bold;"><span data-text="true">right side </span></span><span data-offset-key="d1vud-0-2"><span data-text="true">of the screen</span></span></div>
- <div class="public-DraftStyleDefault-block public-DraftStyleDefault-ltr" data-offset-key="bufca-0-0"><span data-offset-key="bufca-0-0"><span data-text="true">Declare new </span></span><span data-offset-key="bufca-0-1" style="font-weight: bold; font-style: italic;"><span data-text="true">xRange</span></span><span data-offset-key="bufca-0-2"><span data-text="true"> variable, then replace the hardcoded values with them</span></span></div>
- <div class="public-DraftStyleDefault-block public-DraftStyleDefault-ltr" data-offset-key="3l4co-0-0"><div class="public-DraftStyleDefault-block public-DraftStyleDefault-ltr" data-offset-key="3l4co-0-0"><span data-offset-key="3l4co-0-0"><span data-text="true">Add </span></span><span data-offset-key="3l4co-0-1" style="font-weight: bold;"><span data-text="true">comments</span></span><span data-offset-key="3l4co-0-2"><span data-offset-key="3l4co-0-2"><span data-text="true"> to your code or not lol  
      
    </span></span></span></div></div>```
    
    using UnityEngine;
    
    public class Movement : MonoBehaviour
    {
        [SerializeField]
        private float horizontalInput;
        [SerializeField]
        private float speed = 10.0f;
        [SerializeField]
        private float xRange = 20.0f;
        // Start is called before the first frame update
        void Start()
        {
            
        }
    
        // Update is called once per frame
        void Update()
        {
            if (transform.position.x < -xRange)
            {
                transform.position = new Vector3(-xRange, transform.position.y , transform.position.z);
            }
            if (transform.position.x > xRange)
            {
                transform.position = new Vector3(xRange, transform.position.y, transform.position.z);
            }
            horizontalInput = Input.GetAxis("Horizontal");
            transform.Translate(Vector3.right * horizontalInput * Time.deltaTime * speed);
        }
    }
    
    ```
    
    <div><div class="" data-block="true" data-editor="editorBody_6" data-offset-key="e8r65-0-0"></div></div>

New Functionality

The player can move left and right based on the user’s left and right key presses

The player will not be able to leave the play area on either side  
New Concepts &amp; Skills  
Adjust object scale  
If-statements  
Greater/Less than operators  
Next Lesson, We’ll learn how to create and throw endless amounts of food to feed our animals!  
  
  
now use chat gpt to teach me thing and fix a bug that can occur when you move fast

float clampedX = Mathf.Clamp(desiredpoz.x, -Xrange, Xrange) become the min/max

```
using UnityEngine;
//needed a bit of editing coz cgpt3.5 is stoooooooopid
public class Movement : MonoBehaviour
{
    [SerializeField]
    private float speed = 10.0f;
    [SerializeField]
    private float xRange = 10.0f;
    [SerializeField]
    private float horizontalInput;
    // Start is called before the first frame update
    void Start()
    {

    }

    // Update is called once per frame
    void Update()
    {
        horizontalInput = Input.GetAxis("Horizontal");

        // Calculate the desired position based on the input
        Vector3 desiredPosition = transform.position + Vector3.right * -horizontalInput * Time.deltaTime * speed;

        // Clamp the desired position within the x range
        float clampedX = Mathf.Clamp(desiredPosition.x, -xRange, xRange);
        desiredPosition = new Vector3(clampedX, desiredPosition.y, desiredPosition.z);
        // Move the object to the clamped position
        transform.position = desiredPosition;
    }
}

```

# 3. Instantiation

<span data-offset-key="b0000-0-0" style="font-style: italic;"><span data-text="true">The first thing we must do is give the projectile some forward movement so it can zip across the scene when it’s launched by the player.</span></span>

#### <span class="step-index_3pnc7n2S">1.</span>Make the projectile fly forwards

- <div class="public-DraftStyleDefault-block public-DraftStyleDefault-ltr" data-offset-key="d42bt-0-0"><span data-offset-key="d42bt-0-0"><span data-text="true">Create a new “</span></span><span data-offset-key="d42bt-0-1" style="text-decoration: underline;"><span data-text="true">MoveForward</span></span><span data-offset-key="d42bt-0-2"><span data-text="true">” script, </span></span><span data-offset-key="d42bt-0-3" style="font-weight: bold;"><span data-text="true">attach</span></span><span data-offset-key="d42bt-0-4"><span data-text="true"> it to the food object, then open it</span></span></div>
- <div class="public-DraftStyleDefault-block public-DraftStyleDefault-ltr" data-offset-key="d42bt-0-0"><span data-offset-key="cct8b-0-0"><span data-text="true">Declare a new </span></span><span data-offset-key="cct8b-0-1" style="font-weight: bold; font-style: italic;"><span data-text="true">public float speed</span></span><span data-offset-key="cct8b-0-2"><span data-text="true"> variable</span></span><span data-offset-key="cct8b-0-3" style="font-weight: bold; font-style: italic;"><span data-text="true">;</span></span></div>
- <div class="public-DraftStyleDefault-block public-DraftStyleDefault-ltr" data-offset-key="d42bt-0-0"><span data-offset-key="7rsgs-0-0"><span data-text="true">In </span></span><span data-offset-key="7rsgs-0-1" style="font-weight: bold; font-style: italic;"><span data-text="true">Update()</span></span><span data-offset-key="7rsgs-0-2"><span data-text="true">, add </span></span><span data-offset-key="7rsgs-0-3" style="font-weight: bold; font-style: italic;"><span data-text="true">transform.Translate(Vector3.forward \* Time.deltaTime \* speed);</span></span><span data-offset-key="7rsgs-0-4"><span data-text="true">, then </span></span><span data-offset-key="7rsgs-0-5" style="font-weight: bold;"><span data-text="true">save</span></span></div>
- <div class="public-DraftStyleDefault-block public-DraftStyleDefault-ltr" data-offset-key="d42bt-0-0"><span data-offset-key="5csh1-0-0"><span data-text="true">In the </span></span><span data-offset-key="5csh1-0-1" style="font-weight: bold;"><span data-text="true">Inspector</span></span><span data-offset-key="5csh1-0-2"><span data-text="true">, set the projectile’s </span></span><span data-offset-key="5csh1-0-3" style="font-weight: bold;"><span data-text="true">speed</span></span><span data-offset-key="5csh1-0-4"><span data-text="true"> variable, then test</span></span></div>

```
using UnityEngine;

public class Pizza_gun : MonoBehaviour
{
    public GameObject Ammo;

    public float Weapon_Bullet_Projectile_Speed = 60.0f;
    // Start is called before the first frame update
    void Start()
    {
        Ammo = GetComponent<GameObject>();
    }

    // Update is called once per frame
    void Update()
    {
        transform.Translate(Vector3.forward * Time.deltaTime * Weapon_Bullet_Projectile_Speed);
    }
}

```

- <div class="public-DraftStyleDefault-block public-DraftStyleDefault-ltr" data-offset-key="256ug-0-0"><span data-offset-key="256ug-0-0"><span data-text="true">Create a new “</span></span><span data-offset-key="256ug-0-1" style="text-decoration: underline;"><span data-text="true">Prefabs</span></span><span data-offset-key="256ug-0-2"><span data-text="true">” folder, drag your food into it, and choose </span></span><span data-offset-key="256ug-0-3" style="font-weight: bold;"><span data-text="true">Original Prefab</span></span></div>
- <div class="public-DraftStyleDefault-block public-DraftStyleDefault-ltr" data-offset-key="256ug-0-0"><span data-offset-key="bij7d-0-0"><span data-text="true">In PlayerController.cs, declare a new </span></span><span data-offset-key="bij7d-0-1" style="font-weight: bold; font-style: italic;"><span data-text="true">public GameObject projectilePrefab;</span></span><span data-offset-key="bij7d-0-2"><span data-text="true"> variable</span></span></div>
- <div class="public-DraftStyleDefault-block public-DraftStyleDefault-ltr" data-offset-key="256ug-0-0"><span data-offset-key="5qt98-0-0" style="font-weight: bold;"><span data-text="true">Select</span></span><span data-offset-key="5qt98-0-1"><span data-text="true"> the Player in the hierarchy, then </span></span><span data-offset-key="5qt98-0-2" style="font-weight: bold;"><span data-text="true">drag</span></span><span data-offset-key="5qt98-0-3"><span data-text="true"> the object from your Prefabs folder onto the new </span></span><span data-offset-key="5qt98-0-4" style="font-weight: bold;"><span data-text="true">Projectile Prefab box</span></span><span data-offset-key="5qt98-0-5"><span data-text="true"> in the inspector</span></span></div>
- <div class="public-DraftStyleDefault-block public-DraftStyleDefault-ltr" data-offset-key="256ug-0-0"><span data-offset-key="7r56p-0-0"><span data-text="true">Try </span></span><span data-offset-key="7r56p-0-1" style="font-weight: bold;"><span data-text="true">dragging</span></span><span data-offset-key="7r56p-0-2"><span data-text="true"> the projectile into the scene at runtime to make sure they fly</span></span></div>
- <span data-offset-key="7r56p-0-2"><span data-text="true">I added the ammo = get component thing for maybe powerups</span></span>
- <span data-offset-key="d2vg4-0-0"><span data-text="true">In PlayerController.cs, in </span></span><span data-offset-key="d2vg4-0-1" style="font-weight: bold; font-style: italic;"><span data-text="true">Update()</span></span><span data-offset-key="d2vg4-0-2"><span data-text="true">, add an </span></span><span data-offset-key="d2vg4-0-3" style="font-weight: bold;"><span data-text="true">if-statement</span></span><span data-offset-key="d2vg4-0-4"><span data-text="true"> checking for a spacebar press: </span></span><span data-offset-key="d2vg4-0-5" style="font-weight: bold; font-style: italic;"><span data-text="true">if (Input.GetKeyDown(KeyCode.Space)) {}</span></span>
- <span data-offset-key="1ktc-0-0"><span data-text="true">Inside the if-statement, add a comment saying that you should </span></span><span data-offset-key="1ktc-0-1" style="font-weight: bold; font-style: italic;"><span data-text="true">// Launch a projectile from the player</span></span>
- <div class="public-DraftStyleDefault-block public-DraftStyleDefault-ltr" data-offset-key="4lret-0-0"><span data-offset-key="4lret-0-0"><span data-text="true">Inside the if-statement, use the </span></span><span data-offset-key="4lret-0-1" style="font-weight: bold;"><span data-text="true">Instantiate</span></span><span data-offset-key="4lret-0-2"><span data-text="true"> method to spawn a projectile at the player’s location with the prefab’s rotation</span></span></div>
- <div class="public-DraftStyleDefault-block public-DraftStyleDefault-ltr" data-offset-key="4lret-0-0"><span data-offset-key="3dc5-0-0" style="font-weight: bold;"><span data-text="true">Select</span></span><span data-offset-key="3dc5-0-1"><span data-text="true"> all three animals in the hierarchy and </span></span><span data-offset-key="3dc5-0-2" style="font-style: italic;"><span data-text="true">Add Component &gt; </span></span><span data-offset-key="3dc5-0-3" style="font-weight: bold; font-style: italic;"><span data-text="true">Move Forward</span></span><span data-offset-key="bir1k-0-0" style="font-weight: bold;"><span data-text="true">Rotate</span></span><span data-offset-key="bir1k-0-1"><span data-text="true"> all animals on the Y axis by </span></span><span data-offset-key="bir1k-0-2" style="font-weight: bold;"><span data-text="true">180 degrees</span></span><span data-offset-key="bir1k-0-3"><span data-text="true"> to face down</span></span></div>
- <div class="public-DraftStyleDefault-block public-DraftStyleDefault-ltr" data-offset-key="4lret-0-0"><span data-offset-key="bhouu-0-0"><span data-text="true">Edit their </span></span><span data-offset-key="bhouu-0-1" style="font-weight: bold;"><span data-text="true">speed values</span></span><span data-offset-key="bhouu-0-2"><span data-text="true"> and </span></span><span data-offset-key="bhouu-0-3" style="font-weight: bold;"><span data-text="true">test</span></span><span data-offset-key="bhouu-0-4"><span data-text="true"> to see how it looks</span></span></div>
- <div class="public-DraftStyleDefault-block public-DraftStyleDefault-ltr" data-offset-key="4lret-0-0"><span data-offset-key="9et7a-0-0"><span data-text="true">Drag all three animals into the </span></span><span data-offset-key="9et7a-0-1" style="font-weight: bold;"><span data-text="true">Prefabs folder</span></span><span data-offset-key="9et7a-0-2"><span data-text="true">, choosing “Original Prefab”</span></span></div>
- <div class="public-DraftStyleDefault-block public-DraftStyleDefault-ltr" data-offset-key="4lret-0-0"><span data-offset-key="3dh7l-0-0" style="font-weight: bold;"><span data-text="true">Test</span></span><span data-offset-key="3dh7l-0-1"><span data-text="true"> by dragging prefabs into scene view during gameplay</span></span></div>
- 

```
using UnityEngine;

public class Movement : MonoBehaviour
{
    [SerializeField]
    private float speed = 10.0f;
    [SerializeField]
    private float xRange = 10.0f;
    [SerializeField]
    private float horizontalInput;
    [SerializeField] 
    public GameObject ProjectilePrefab;
    // Start is called before the first frame update
    void Start()
    {

    }

    // Update is called once per frame
    void Update()
    {


        horizontalInput = Input.GetAxis("Horizontal");
        // Calculate the desired position based on the input
        Vector3 desiredPosition = transform.position + Vector3.right * -horizontalInput * Time.deltaTime * speed;
        // Clamp the desired position within the x range
        float clampedX = Mathf.Clamp(desiredPosition.x, -xRange, xRange);
        desiredPosition = new Vector3(clampedX, desiredPosition.y, desiredPosition.z);
        // Move the object to the clamped position
        transform.position = desiredPosition;
        if (Input.GetKeyDown(KeyCode.Space))
        {
            // shoot pizza
            Instantiate(ProjectilePrefab, transform.position, ProjectilePrefab.transform.rotation);
        }
    }
}

```

#### <span class="step-index_3pnc7n2S">5.</span>Make animals into prefabs

- <div class="public-DraftStyleDefault-block public-DraftStyleDefault-ltr" data-offset-key="bir1k-0-0"><span data-offset-key="bir1k-0-0" style="font-weight: bold;"><span data-text="true">Rotate</span></span><span data-offset-key="bir1k-0-1"><span data-text="true"> all animals on the Y axis by </span></span><span data-offset-key="bir1k-0-2" style="font-weight: bold;"><span data-text="true">180 degrees</span></span><span data-offset-key="bir1k-0-3"><span data-text="true"> to face down/ towards the player  
    </span></span></div>
- <div class="public-DraftStyleDefault-block public-DraftStyleDefault-ltr" data-offset-key="bir1k-0-0"><span data-offset-key="3dc5-0-0" style="font-weight: bold;"><span data-text="true">Select</span></span><span data-offset-key="3dc5-0-1"><span data-text="true"> all three animals in the hierarchy and </span></span><span data-offset-key="3dc5-0-2" style="font-style: italic;"><span data-text="true">Add Component &gt; </span></span><span data-offset-key="3dc5-0-3" style="font-weight: bold; font-style: italic;"><span data-text="true">Move Forward</span></span></div>
- <div class="public-DraftStyleDefault-block public-DraftStyleDefault-ltr" data-offset-key="bir1k-0-0"><span data-offset-key="bhouu-0-0"><span data-text="true">Edit their </span></span><span data-offset-key="bhouu-0-1" style="font-weight: bold;"><span data-text="true">speed values</span></span><span data-offset-key="bhouu-0-2"><span data-text="true"> and </span></span><span data-offset-key="bhouu-0-3" style="font-weight: bold;"><span data-text="true">test</span></span><span data-offset-key="bhouu-0-4"><span data-text="true"> to see how it looks</span></span></div>
- <div class="public-DraftStyleDefault-block public-DraftStyleDefault-ltr" data-offset-key="bir1k-0-0"><span data-offset-key="9et7a-0-0"><span data-text="true">Drag all three animals into the </span></span><span data-offset-key="9et7a-0-1" style="font-weight: bold;"><span data-text="true">Prefabs folder</span></span><span data-offset-key="9et7a-0-2"><span data-text="true">, choosing “Original Prefab”</span></span></div>
- <div class="public-DraftStyleDefault-block public-DraftStyleDefault-ltr" data-offset-key="bir1k-0-0"><span data-offset-key="3dh7l-0-0" style="font-weight: bold;"><span data-text="true">Test</span></span><span data-offset-key="3dh7l-0-1"><span data-text="true"> by dragging prefabs into scene view during gameplay</span></span></div>

#### <span class="step-index_3pnc7n2S">6.</span>Destroy projectiles offscreen

- <div class="public-DraftStyleDefault-block public-DraftStyleDefault-ltr" data-offset-key="frrhg-0-0"><span data-offset-key="frrhg-0-0"><span data-text="true">Create “</span></span><span data-offset-key="frrhg-0-1" style="text-decoration: underline;"><span data-text="true">DestroyOutOfBounds</span></span><span data-offset-key="frrhg-0-2"><span data-text="true">” script and apply it to the </span></span><span data-offset-key="frrhg-0-3" style="font-weight: bold;"><span data-text="true">projectile</span></span></div>
- <div class="public-DraftStyleDefault-block public-DraftStyleDefault-ltr" data-offset-key="frrhg-0-0"><span data-offset-key="a7cvd-0-0"><span data-text="true">Add a new </span></span><span data-offset-key="a7cvd-0-1" style="font-weight: bold; font-style: italic;"><span data-text="true">private float topBound </span></span><span data-offset-key="a7cvd-0-2"><span data-text="true">variable and initialize it </span></span><span data-offset-key="a7cvd-0-3" style="font-weight: bold; font-style: italic;"><span data-text="true">= 30;</span></span></div>
- <div class="public-DraftStyleDefault-block public-DraftStyleDefault-ltr" data-offset-key="frrhg-0-0"><span data-offset-key="bce7o-0-0"><span data-text="true">Write code to destroy if out of top bounds </span></span><span data-offset-key="bce7o-0-1" style="font-weight: bold; font-style: italic;"><span data-text="true">if (transform.position.z &gt; topBound) {</span></span> <span data-offset-key="bce7o-0-3" style="font-weight: bold; font-style: italic;"><span data-text="true">Destroy(gameObject); }</span></span></div>
- <div class="public-DraftStyleDefault-block public-DraftStyleDefault-ltr" data-offset-key="frrhg-0-0"><span data-offset-key="2d5mf-0-0"><span data-text="true">In the Inspector </span></span><span data-offset-key="2d5mf-0-1" style="font-weight: bold;"><span data-text="true">Overrides</span></span><span data-offset-key="2d5mf-0-2"><span data-text="true"> drop-down, click </span></span><span data-offset-key="2d5mf-0-3" style="font-weight: bold;"><span data-text="true">Apply all</span></span><span data-offset-key="2d5mf-0-4"><span data-text="true"> to apply it to prefab</span></span></div>

#### <span class="step-index_3pnc7n2S">7. </span>Destroy animals offscreen

- <div class="public-DraftStyleDefault-block public-DraftStyleDefault-ltr" data-offset-key="9ee7-0-0"><span data-offset-key="9ee7-0-0"><span data-text="true">Create </span></span><span data-offset-key="9ee7-0-1" style="font-weight: bold;"><span data-text="true">else-if statement</span></span><span data-offset-key="9ee7-0-2"><span data-text="true"> to check if objects are beneath </span></span><span data-offset-key="9ee7-0-3" style="font-weight: bold; font-style: italic;"><span data-text="true">lowerBound</span></span><span data-offset-key="9ee7-0-4"><span data-text="true">: </span></span><span data-offset-key="9ee7-0-5" style="font-weight: bold; font-style: italic;"><span data-text="true">else if (transform.position.z &lt; lowerBound)</span></span></div>
- <div class="public-DraftStyleDefault-block public-DraftStyleDefault-ltr" data-offset-key="9ee7-0-0"><span data-offset-key="aq7da-0-0" style="font-weight: bold;"><span data-text="true">Apply</span></span><span data-offset-key="aq7da-0-1"><span data-text="true"> the script to all of the animals, then </span></span><span data-offset-key="aq7da-0-2" style="font-weight: bold;"><span data-text="true">Override</span></span><span data-offset-key="aq7da-0-3"><span data-text="true"> the prefabs</span></span></div>
- 

## <span class="step-index_3pnc7n2S">8.</span>Lesson Recap

<div id="bkmrk-new-functionality-th"><div><div class="" data-block="true" data-editor="editorBody_7" data-offset-key="a0kdh-0-0"><div class="public-DraftStyleDefault-block public-DraftStyleDefault-ltr" data-offset-key="a0kdh-0-0"><span data-offset-key="a0kdh-0-0"><span data-text="true">New Functionality</span></span></div><div class="public-DraftStyleDefault-block public-DraftStyleDefault-ltr" data-offset-key="a0kdh-0-0">- <span data-offset-key="6ki8o-0-0"><span data-text="true">The player can press the Spacebar to launch a projectile prefab,</span></span>

</div></div></div></div><span data-offset-key="dgru8-0-0"><span data-text="true">Projectile and Animals are removed from the scene if they leave the screen</span></span>

<div id="bkmrk-new-concepts-%26-skill"><div><div class="" data-block="true" data-editor="editorBody_7" data-offset-key="a0kdh-0-0"><div class="public-DraftStyleDefault-block public-DraftStyleDefault-ltr" data-offset-key="a0kdh-0-0"><div class="" data-block="true" data-editor="editorBody_7" data-offset-key="90m98-0-0"><div class="public-DraftStyleDefault-block public-DraftStyleDefault-ltr" data-offset-key="90m98-0-0"></div><div class="public-DraftStyleDefault-block public-DraftStyleDefault-ltr" data-offset-key="90m98-0-0"><span data-offset-key="90m98-0-0"><span data-text="true">New Concepts &amp; Skills</span></span></div></div>- <span data-offset-key="a1s6j-0-0"><span data-text="true">Create Prefabs</span></span>
- <span data-offset-key="9mdnl-0-0"><span data-text="true">Override Prefabs</span></span>
- <span data-offset-key="3msvk-0-0"><span data-text="true">Test for Key presses</span></span>
- <span data-offset-key="eeef8-0-0"><span data-text="true">Instantiate objects</span></span>
- <span data-offset-key="2lh2t-0-0"><span data-text="true">Destroy objects   
    </span></span><div class="public-DraftStyleDefault-block public-DraftStyleDefault-ltr" data-offset-key="6k73b-0-0"></div>
- <div class="public-DraftStyleDefault-block public-DraftStyleDefault-ltr" data-offset-key="6k73b-0-0"><span data-offset-key="6k73b-0-0"><span data-text="true">Else-if statements</span></span></div>

</div></div></div></div><span data-offset-key="cepfp-0-0"><span data-text="true">Next Lesson</span></span>

- <div class="public-DraftStyleDefault-block public-DraftStyleDefault-ltr" data-offset-key="6l4iv-0-0"><span data-offset-key="6l4iv-0-0"><span data-text="true">Instead of dropping all these animal prefabs onto the scene, we’ll create a herd of animals roaming the plain!</span></span></div>

<span data-offset-key="6l4iv-0-0"><span data-text="true">(</span></span>

<div class="summary-wrap_264BSiek" id="bkmrk-lesson-2.2---food-fl"><div class="title_Pamsf-Zm">Lesson 2.2 - Food Flight</div><div class="summary-skill_2FzwBQpY"><div class="summary-title_rYpNyakI">Skills practiced:</div><div class="skills_1cZhQPOv"><div class="skill-wrap_3FoiCVdI"><div class="skill-title_2DsU0stE">Absolute Beginner Code Comprehension</div><div class="sub-skills"><div class="sub-skill-wrap_2J3EHoby">Interpret simple code</div><div class="sub-skill-wrap_2J3EHoby">Improve simple code using the features of an IDE</div></div></div><div class="skill-wrap_3FoiCVdI"><div class="skill-title_2DsU0stE">Absolute Beginner Application Scripting</div><div class="sub-skills"><div class="sub-skill-wrap_2J3EHoby">Use common logic structures to control the execution of code.</div><div class="sub-skill-wrap_2J3EHoby">Write code that utilizes the various Unity APIs</div><div class="sub-skill-wrap_2J3EHoby">Implement appropriate data types</div><div class="sub-skill-wrap_2J3EHoby">Write code that integrates into an existing system</div><div class="sub-skill-wrap_2J3EHoby">Implement a code style that is efficient and easy to read</div><div class="sub-skill-wrap_2J3EHoby">Prototype new concepts</div></div></div></div></div></div><div id="bkmrk-%29"><div data-offset-key="1sk40-0-0">)  
</div><div data-offset-key="1sk40-0-0">  
</div><div class="" data-block="true" data-editor="editorBody_7" data-offset-key="1sk40-0-0"><div class="public-DraftStyleDefault-block public-DraftStyleDefault-ltr" data-offset-key="1sk40-0-0"></div></div></div>

# Random Animal Stampeed

#### <span class="step-index_3pnc7n2S">1.</span> Create a spawn manager

- <span data-offset-key="2je8v-0-0"><span data-text="true">In the Hierarchy, create an </span></span><span data-offset-key="2je8v-0-1" style="font-weight: bold;"><span data-text="true">Empty object</span></span><span data-offset-key="2je8v-0-2"><span data-text="true"> called “</span></span><span data-offset-key="2je8v-0-3" style="text-decoration: underline;"><span data-text="true">SpawnManager</span></span><span data-offset-key="2je8v-0-4"><span data-text="true">”</span></span>
- <span data-offset-key="78ksq-0-0"><span data-text="true">Create a new script called “</span></span><span data-offset-key="78ksq-0-1" style="text-decoration: underline;"><span data-text="true">SpawnManager</span></span><span data-offset-key="78ksq-0-2"><span data-text="true">”, attach it to the </span></span><span data-offset-key="78ksq-0-3" style="font-weight: bold;"><span data-text="true">Spawn Manager</span></span><span data-offset-key="78ksq-0-4"><span data-text="true">, and open it</span></span>
- <span data-offset-key="f1q8c-0-0"><span data-text="true">Declare new </span></span><span data-offset-key="f1q8c-0-1" style="font-weight: bold; font-style: italic;"><span data-text="true">public GameObject\[ \] animalPrefabs;</span></span>
- <span data-offset-key="fspas-0-0"><span data-text="true">In the Inspector, change the </span></span><span data-offset-key="fspas-0-1" style="font-weight: bold;"><span data-text="true">Array size</span></span><span data-offset-key="fspas-0-2"><span data-text="true"> to match your animal count, then </span></span><span data-offset-key="fspas-0-3" style="font-weight: bold;"><span data-text="true">assign</span></span><span data-offset-key="fspas-0-4"><span data-text="true"> your animals by </span></span><span data-offset-key="fspas-0-5" style="font-weight: bold;"><span data-text="true">dragging </span></span><span data-offset-key="fspas-0-6"><span data-text="true">them from the Project window into the empty slots </span></span><span data-offset-key="fspas-0-7" style="font-weight: bold;"><span data-text="true">Note: </span></span><span data-offset-key="fspas-0-8"><span data-text="true">Make sure you drag them from the </span></span><span data-offset-key="fspas-0-9" style="font-weight: bold;"><span data-text="true">Project </span></span><span data-offset-key="fspas-0-10"><span data-text="true">window; not the Hierarchy! If you're going to spawn objects, you need to make sure you're using Prefabs, which are stored in the Project window.</span></span>

#### <span class="step-index_3pnc7n2S">2.</span> Spawn an animal if S is pressed

- <span data-offset-key="d2kl5-0-0"><span data-text="true">In </span></span><span data-offset-key="d2kl5-0-1" style="font-weight: bold; font-style: italic;"><span data-text="true">Update()</span></span><span data-offset-key="d2kl5-0-2"><span data-text="true">, write an if-then statement to </span></span><span data-offset-key="d2kl5-0-3" style="font-weight: bold;"><span data-text="true">instantiate</span></span><span data-offset-key="d2kl5-0-4"><span data-text="true"> a new animal prefab at the top of the screen if </span></span><span data-offset-key="d2kl5-0-5" style="font-weight: bold;"><span data-text="true">S </span></span><span data-offset-key="d2kl5-0-6"><span data-text="true">is pressed</span></span>
- <span data-offset-key="c9aur-0-0"><span data-text="true">Declare a new </span></span><span data-offset-key="c9aur-0-1" style="font-weight: bold; font-style: italic;"><span data-text="true">public int animalIndex</span></span><span data-offset-key="c9aur-0-2"><span data-text="true"> and incorporate it in the </span></span><span data-offset-key="c9aur-0-3" style="font-weight: bold;"><span data-text="true">Instantiate </span></span><span data-offset-key="c9aur-0-4"><span data-text="true">call, then test editing the value in the Inspector</span></span>

#### <span class="step-index_3pnc7n2S">3.</span> Spawn random animals from an array

- <span data-offset-key="9javl-0-0"><span data-text="true">In the if-statement checking if S is pressed, generate a random </span></span><span data-offset-key="9javl-0-1" style="font-weight: bold; font-style: italic;"><span data-text="true">int animalIndex </span></span><span data-offset-key="9javl-0-2"><span data-text="true">between 0 and the length of the array</span></span>
- <span data-offset-key="90ftq-0-0"><span data-text="true">Remove the global </span></span><span data-offset-key="90ftq-0-1" style="font-weight: bold; font-style: italic;"><span data-text="true">animalIndex</span></span><span data-offset-key="90ftq-0-2"><span data-text="true"> variable, since it is only needed locally in the </span></span><span data-offset-key="90ftq-0-3" style="font-weight: bold;"><span data-text="true">if-statement</span></span>


#### <span class="step-index_3pnc7n2S">4.</span> Randomize the spawn location

- <span data-offset-key="er8h8-0-0" style="font-weight: bold;"><span data-text="true">Replace</span></span><span data-offset-key="er8h8-0-1"><span data-text="true"> the X value for the Vector3 with </span></span><span data-offset-key="er8h8-0-2" style="font-weight: bold; font-style: italic;"><span data-text="true">Random.Range(-20, 20)</span></span><span data-offset-key="er8h8-0-3"><span data-text="true">, then test</span></span>
- <span data-offset-key="d3ca9-0-0"><span data-text="true">Within the </span></span><span data-offset-key="d3ca9-0-1" style="font-weight: bold;"><span data-text="true">if-statement</span></span><span data-offset-key="d3ca9-0-2"><span data-text="true">, make a new local </span></span><span data-offset-key="d3ca9-0-3" style="font-weight: bold; font-style: italic;"><span data-text="true">Vector3 spawnPos</span></span><span data-offset-key="d3ca9-0-4"><span data-text="true"> variable </span></span>
- <span data-offset-key="c8ueq-0-0"><span data-text="true">At the top of the class, create </span></span><span data-offset-key="c8ueq-0-1" style="font-weight: bold; font-style: italic;"><span data-text="true">private float</span></span><span data-offset-key="c8ueq-0-2"><span data-text="true"> variables for </span></span><span data-offset-key="c8ueq-0-3" style="font-weight: bold; font-style: italic;"><span data-text="true">spawnRangeX</span></span><span data-offset-key="c8ueq-0-4"><span data-text="true"> and </span></span><span data-offset-key="c8ueq-0-5" style="font-weight: bold; font-style: italic;"><span data-text="true">spawnPosZ</span></span>

<span class="step-index_3pnc7n2S">5.</span> Change the perspective of the camera

- <span data-offset-key="98crv-0-0"><span data-text="true">Toggle between </span></span><span data-offset-key="98crv-0-1" style="font-weight: bold;"><span data-text="true">Perspective</span></span><span data-offset-key="98crv-0-2"><span data-text="true"> and </span></span><span data-offset-key="98crv-0-3" style="font-weight: bold;"><span data-text="true">Isometric</span></span><span data-offset-key="98crv-0-4"><span data-text="true"> view in the Scene view to appreciate the difference</span></span>
- <span data-offset-key="1nd15-0-0"><span data-text="true">Select the </span></span><span data-offset-key="1nd15-0-1" style="font-weight: bold;"><span data-text="true">camera</span></span><span data-offset-key="1nd15-0-2"><span data-text="true"> and change the </span></span><span data-offset-key="1nd15-0-3" style="font-weight: bold;"><span data-text="true">Projection</span></span><span data-offset-key="1nd15-0-4"><span data-text="true"> from “Perspective” to “Orthographic”</span></span>

<span class="step-index_3pnc7n2S">6.</span> Lesson Recap

<div class="" data-block="true" data-editor="editorBody_5" data-offset-key="2snu3-0-0" id="bkmrk-new-functionality"><div class="public-DraftStyleDefault-block public-DraftStyleDefault-ltr" data-offset-key="2snu3-0-0"><span data-offset-key="2snu3-0-0"><span data-text="true">New Functionality</span></span></div></div>- <span data-offset-key="94l2b-0-0"><span data-text="true">The player can press the S to spawn an animal</span></span>
- <span data-offset-key="20q6d-0-0"><span data-text="true">Animal selection and spawn location are randomized</span></span>
- <span data-offset-key="8gkui-0-0"><span data-text="true">Camera projection (perspective/orthographic) selected</span></span><span data-offset-key="2ce1r-0-0"><span data-text="true">  
    </span></span>


<span data-offset-key="2ce1r-0-0"><span data-text="true">New Concepts &amp; Skills</span></span>

- - <span data-offset-key="5kv4h-0-0"><span data-text="true">Spawn Manager</span></span>
    - <span data-offset-key="f90v9-0-0"><span data-text="true">Arrays</span></span>
    - <span data-offset-key="bcthe-0-0"><span data-text="true">Keycodes</span></span>
    - <span data-offset-key="4jrs2-0-0"><span data-text="true">Random generation</span></span>
    - <span data-offset-key="e2mto-0-0"><span data-text="true">Local vs Global variables</span></span>
    - <span data-offset-key="e2mto-0-0"><span data-text="true">Perspective</span></span><span data-offset-key="eeh84-0-0"><span data-text="true"> vs Isometric projections</span></span>

<span data-offset-key="9313r-0-0"><span data-text="true">Next Lesson</span></span>

- <span data-offset-key="ki0o-0-0"><span data-text="true">Using collisions to feed our animals!</span></span>

# Collision Decisions + GAME OVER

## <span class="step-index_3pnc7n2S">1. </span>Make a new method to spawn animals

- <div class="public-DraftStyleDefault-block public-DraftStyleDefault-ltr" data-offset-key="f1fob-0-0"><span data-offset-key="f1fob-0-0"><span data-text="true">In </span></span><span data-offset-key="f1fob-0-1" style="font-weight: bold;"><span data-text="true">SpawnManager.cs</span></span><span data-offset-key="f1fob-0-2"><span data-text="true">, create a new </span></span><span data-offset-key="f1fob-0-3" style="font-weight: bold; font-style: italic;"><span data-text="true">void SpawnRandomAnimal() {}</span></span><span data-offset-key="f1fob-0-4"><span data-text="true"> function beneath </span></span><span data-offset-key="f1fob-0-5" style="font-weight: bold; font-style: italic;"><span data-text="true">Update()</span></span></div>
- <div class="public-DraftStyleDefault-block public-DraftStyleDefault-ltr" data-offset-key="f1fob-0-0"><span data-offset-key="d2knm-0-0"><span data-text="true">Cut and paste the code from the </span></span><span data-offset-key="d2knm-0-1" style="font-weight: bold;"><span data-text="true">if-then statement</span></span><span data-offset-key="d2knm-0-2"><span data-text="true"> to the </span></span><span data-offset-key="d2knm-0-3" style="font-weight: bold;"><span data-text="true">new function</span></span></div>
- <div class="public-DraftStyleDefault-block public-DraftStyleDefault-ltr" data-offset-key="f1fob-0-0"><span data-offset-key="6ibv-0-0"><span data-text="true">Call </span></span><span data-offset-key="6ibv-0-1" style="font-weight: bold; font-style: italic;"><span data-text="true">SpawnRandomAnimal();</span></span><span data-offset-key="6ibv-0-2"><span data-text="true"> if </span></span><span data-offset-key="6ibv-0-3" style="font-weight: bold;"><span data-text="true">S</span></span><span data-offset-key="6ibv-0-4"><span data-text="true"> is pressed</span></span></div>

## <span class="step-index_3pnc7n2S">2.</span> Spawn the animals at timed intervals

- <div class="public-DraftStyleDefault-block public-DraftStyleDefault-ltr" data-offset-key="5a6h3-0-0"><span data-offset-key="5a6h3-0-0"><span data-text="true">In </span></span><span data-offset-key="5a6h3-0-1" style="font-weight: bold; font-style: italic;"><span data-text="true">Start()</span></span><span data-offset-key="5a6h3-0-2"><span data-text="true">, use </span></span><span data-offset-key="5a6h3-0-3" style="font-weight: bold; font-style: italic;"><span data-text="true">InvokeRepeating</span></span><span data-offset-key="5a6h3-0-4"><span data-text="true"> to spawn the animals based on an interval, then </span></span><span data-offset-key="5a6h3-0-5" style="font-weight: bold;"><span data-text="true">test</span></span><span data-offset-key="5a6h3-0-6"><span data-text="true">.</span></span></div>
- <div class="public-DraftStyleDefault-block public-DraftStyleDefault-ltr" data-offset-key="5a6h3-0-0"><span data-offset-key="36buv-0-0"><span data-text="true">Remove the</span></span><span data-offset-key="36buv-0-1" style="font-weight: bold;"><span data-text="true"> if-then statement</span></span><span data-offset-key="36buv-0-2"><span data-text="true"> that tests for </span></span><span data-offset-key="36buv-0-3" style="font-weight: bold;"><span data-text="true">S</span></span><span data-offset-key="36buv-0-4"><span data-text="true"> being pressed</span></span></div>
- <div class="public-DraftStyleDefault-block public-DraftStyleDefault-ltr" data-offset-key="5a6h3-0-0"><span data-offset-key="b7cpc-0-0"><span data-text="true">Declare new </span></span><span data-offset-key="b7cpc-0-1" style="font-weight: bold; font-style: italic;"><span data-text="true">private startDelay</span></span><span data-offset-key="b7cpc-0-2"><span data-text="true"> and </span></span><span data-offset-key="b7cpc-0-3" style="font-weight: bold; font-style: italic;"><span data-text="true">spawnInterval</span></span><span data-offset-key="b7cpc-0-4"><span data-text="true"> variables then playtest and tweak variable values</span></span></div>

## <span class="step-index_3pnc7n2S">3.</span> Add collider and trigger components

- <div class="public-DraftStyleDefault-block public-DraftStyleDefault-ltr" data-offset-key="chn26-0-0"><span data-offset-key="chn26-0-0"><span data-text="true">Double-click on one of the </span></span><span data-offset-key="chn26-0-1" style="font-weight: bold;"><span data-text="true">animal prefabs</span></span><span data-offset-key="chn26-0-2"><span data-text="true">, then </span></span><span data-offset-key="chn26-0-3" style="font-style: italic;"><span data-text="true">Add Component &gt; Box Collider</span></span></div>
- <div class="public-DraftStyleDefault-block public-DraftStyleDefault-ltr" data-offset-key="chn26-0-0"><span data-offset-key="aguuj-0-0"><span data-text="true">Click </span></span><span data-offset-key="aguuj-0-1" style="font-weight: bold;"><span data-text="true">Edit Collider</span></span><span data-offset-key="aguuj-0-2"><span data-text="true">, then </span></span><span data-offset-key="aguuj-0-3" style="font-weight: bold;"><span data-text="true">drag</span></span><span data-offset-key="aguuj-0-4"><span data-text="true"> the collider handles to encompass the object</span></span></div>
- <div class="public-DraftStyleDefault-block public-DraftStyleDefault-ltr" data-offset-key="chn26-0-0"><span data-offset-key="380nm-0-0"><span data-text="true">Check the “</span></span><span data-offset-key="380nm-0-1" style="font-weight: bold;"><span data-text="true">Is Trigger</span></span><span data-offset-key="380nm-0-2"><span data-text="true">” checkbox</span></span></div>
- <div class="public-DraftStyleDefault-block public-DraftStyleDefault-ltr" data-offset-key="chn26-0-0"><span data-offset-key="654rd-0-0"><span data-text="true">Repeat this process for each of the </span></span><span data-offset-key="654rd-0-1" style="font-weight: bold;"><span data-text="true">animals</span></span><span data-offset-key="654rd-0-2"><span data-text="true"> and the </span></span><span data-offset-key="654rd-0-3" style="font-weight: bold;"><span data-text="true">projectile</span></span></div>
- <div class="public-DraftStyleDefault-block public-DraftStyleDefault-ltr" data-offset-key="chn26-0-0"><span data-offset-key="cs5k5-0-0"><span data-text="true">Add a </span></span><span data-offset-key="cs5k5-0-1" style="font-weight: bold;"><span data-text="true">RigidBody component</span></span><span data-offset-key="cs5k5-0-2"><span data-text="true"> to the projectile and uncheck “use gravity” </span></span></div>

## <span class="step-index_3pnc7n2S">4.</span> Destroy objects on collision

- <div class="public-DraftStyleDefault-block public-DraftStyleDefault-ltr" data-offset-key="bk1l-0-0"><span data-offset-key="bk1l-0-0"><span data-text="true">Create a new </span></span><span data-offset-key="bk1l-0-1" style="font-weight: bold;"><span data-text="true">DetectCollisions.cs</span></span><span data-offset-key="bk1l-0-2"><span data-text="true"> script, add it to each animal prefab, then </span></span><span data-offset-key="bk1l-0-3" style="font-weight: bold;"><span data-text="true">open</span></span><span data-offset-key="bk1l-0-4"><span data-text="true"> it</span></span></div>
- <div class="public-DraftStyleDefault-block public-DraftStyleDefault-ltr" data-offset-key="bk1l-0-0"><span data-offset-key="eo1qh-0-0"><span data-text="true">Before the final </span></span><span data-offset-key="eo1qh-0-1" style="font-weight: bold;"><span data-text="true">}</span></span><span data-offset-key="eo1qh-0-2"><span data-text="true"> add an </span></span><span data-offset-key="eo1qh-0-3" style="font-weight: bold; font-style: italic;"><span data-text="true">OnTriggerEnter</span></span><span data-offset-key="eo1qh-0-4"><span data-text="true"> function using </span></span><span data-offset-key="eo1qh-0-5" style="font-weight: bold;"><span data-text="true">autocomplete</span></span></div>
- <div class="public-DraftStyleDefault-block public-DraftStyleDefault-ltr" data-offset-key="bk1l-0-0"><span data-offset-key="6frbo-0-0"><span data-text="true">In </span></span><span data-offset-key="6frbo-0-1" style="font-weight: bold; font-style: italic;"><span data-text="true">OnTriggerEnter</span></span><span data-offset-key="6frbo-0-2"><span data-text="true">, put </span></span><span data-offset-key="6frbo-0-3" style="font-weight: bold; font-style: italic;"><span data-text="true">Destroy(gameObject)</span></span><span data-offset-key="6frbo-0-4" style="font-weight: bold;"><span data-text="true">;</span></span><span data-offset-key="6frbo-0-5"><span data-text="true">, then test</span></span></div>
- <div class="public-DraftStyleDefault-block public-DraftStyleDefault-ltr" data-offset-key="bk1l-0-0"><span data-offset-key="aa2e6-0-0"><span data-text="true">In </span></span><span data-offset-key="aa2e6-0-1" style="font-weight: bold; font-style: italic;"><span data-text="true">OnTriggerEnter</span></span><span data-offset-key="aa2e6-0-2"><span data-text="true">, put </span></span><span data-offset-key="aa2e6-0-3" style="font-weight: bold; font-style: italic;"><span data-text="true">Destroy(other.gameObject);</span></span></div>

## <span class="step-index_3pnc7n2S">5.</span> Trigger a “Game Over” message

- <div class="public-DraftStyleDefault-block public-DraftStyleDefault-ltr" data-offset-key="dnd83-0-0"><span data-offset-key="dnd83-0-0"><span data-text="true">In DestroyOutOfBounds.cs, in the </span></span><span data-offset-key="dnd83-0-1" style="font-weight: bold;"><span data-text="true">else-if condition</span></span><span data-offset-key="dnd83-0-2"><span data-text="true"> that checks if the animals reach the bottom of the screen, add a Game Over messsage: </span></span><span data-offset-key="dnd83-0-3" style="font-weight: bold; font-style: italic;"><span data-text="true">Debug.Log(“Game Over!”)</span></span></div>
- <div class="public-DraftStyleDefault-block public-DraftStyleDefault-ltr" data-offset-key="dnd83-0-0"><span data-offset-key="bvnd-0-0"><span data-text="true">Clean up your code with </span></span><span data-offset-key="bvnd-0-1" style="font-weight: bold;"><span data-text="true">comments</span></span></div>
- <div class="public-DraftStyleDefault-block public-DraftStyleDefault-ltr" data-offset-key="dnd83-0-0"><span data-offset-key="955jv-0-0"><span data-text="true">If using Visual Studio, Click </span></span><span data-offset-key="955jv-0-1" style="font-style: italic;"><span data-text="true">Edit &gt; Advanced &gt;</span></span><span data-offset-key="955jv-0-2" style="font-style: italic; font-weight: bold;"><span data-text="true"> Format document</span></span><span data-offset-key="955jv-0-3"><span data-text="true"> to fix any indentation issues (On a </span></span><span data-offset-key="955jv-0-4" style="font-weight: bold;"><span data-text="true">Mac</span></span><span data-offset-key="955jv-0-5"><span data-text="true">, click </span></span><span data-offset-key="955jv-0-6" style="font-style: italic;"><span data-text="true">Edit &gt; Format &gt; Format Document)</span></span></div>

## <span class="step-index_3pnc7n2S">6.</span> Lesson Recap

<div id="bkmrk-new-functionality-an"><div class="" data-block="true" data-editor="editorBody_5" data-offset-key="3655v-0-0"><div class="public-DraftStyleDefault-block public-DraftStyleDefault-ltr" data-offset-key="3655v-0-0"><span data-offset-key="3655v-0-0"><span data-text="true">New Functionality</span></span></div><div class="public-DraftStyleDefault-block public-DraftStyleDefault-ltr" data-offset-key="3655v-0-0">- <span data-offset-key="d7r72-0-0"><span data-text="true">Animals spawn on a timed interval and walk down the screen</span></span>
- <span data-offset-key="d7r72-0-0"><span data-text="true">When animals get past the player, it triggers a “Game Over” message</span></span>
- <span data-offset-key="3qsmo-0-0"><span data-text="true">If a projectile collides with an animal, both objects are removed</span></span>

</div></div></div><div id="bkmrk-new-concepts-%26-skill"><div class="" data-block="true" data-editor="editorBody_5" data-offset-key="d794m-0-0"><div class="public-DraftStyleDefault-block public-DraftStyleDefault-ltr" data-offset-key="d794m-0-0"><span data-offset-key="d794m-0-0"><span data-text="true">New Concepts &amp; Skills</span></span></div><div class="public-DraftStyleDefault-block public-DraftStyleDefault-ltr" data-offset-key="d794m-0-0">- <span data-offset-key="5v7c3-0-0"><span data-text="true">Create custom methods/functions</span></span>
- <span data-offset-key="bggs6-0-0"><span data-text="true">InvokeRepeating() to repeat code</span></span>
- <span data-offset-key="5q4or-0-0"><span data-text="true">Colliders and Triggers   
    </span></span>
- <span data-offset-key="akrks-0-0"><span data-text="true">Override functions</span></span>
- <span data-offset-key="b0lne-0-0"><span data-offset-key="b0lne-0-0"><span data-text="true">Log Debug messages to console  
      
    Pizza\_gun  
    </span></span></span>```c#
    using UnityEngine;
    
    public class Pizza_gun : MonoBehaviour
    {
        [SerializeField]
        public float Weapon_Bullet_Projectile_Speed = 60.0f;
        [SerializeField] 
        private float topBound = -60;
    
        // Update is called once per frame
        void Update()
        {
            transform.Translate(Vector3.forward * Time.deltaTime * Weapon_Bullet_Projectile_Speed);
    
           if (transform.position.z < topBound)
            {
                Destroy(gameObject);
            }
    
        }
        private void OnTriggerEnter(Collider other)
        {
            Destroy(gameObject);
            Destroy(other.gameObject);
        }
    }
    
    ```
    
    <span data-offset-key="b0lne-0-0"><span data-text="true">Spawn\_manager  
    </span></span>
- ```
    using System.Collections;
    using System.Collections.Generic;
    using UnityEngine;
    
    public class SpawnManager : MonoBehaviour
    {
        public GameObject[] animalPrefabs = new GameObject[10];
        [SerializeField] 
        private float spawnRangeX = 20.0f;
        [SerializeField] 
        private float spawnPozY = -20.0f;
        [SerializeField]
        private float startDelay = 5f;
        [SerializeField]
       private float spawnInterval = 2f;
        // Start is called before the first frame update
        void Start()
        {
            // invoke repeating, will make the method or void def function with name "nameInQuotes"
            // it will call that function after , delay, then chozen interval
            InvokeRepeating("SpawnRandomAnimal", startDelay, spawnInterval);
        }
    
        // Update is called once per frame
        void Update()
        {
            if (Input.GetKeyDown(KeyCode.S))
            {
               SpawnRandomAnimal();
            }
        }
        void SpawnRandomAnimal()
        {
            // Select a random index within the array range
            int random_animal_Index = Random.Range(0, animalPrefabs.Length);
            Vector3 spawnPos = new Vector3(Random.Range(-spawnRangeX, spawnRangeX), spawnPozY, -30);
            // Instantiate the selected animalPrefab
            Instantiate(animalPrefabs[random_animal_Index], spawnPos,
                animalPrefabs[random_animal_Index].transform.rotation);
        }
    }
    
    ```
- movement
    
    ```
    using UnityEngine;
    
    public class Movement : MonoBehaviour
    {
        [SerializeField]
        private float speed = 10.0f;
        [SerializeField]
        private float xRange = 10.0f;
        [SerializeField]
        private float horizontalInput;
        [SerializeField] 
        public GameObject ProjectilePrefab;
        // Start is called before the first frame update
        void Start()
        {
    
        }
    
        // Update is called once per frame
        void Update()
        {
    
    
            horizontalInput = Input.GetAxis("Horizontal");
            // Calculate the desired position based on the input
            Vector3 desiredPosition = transform.position + Vector3.right * -horizontalInput * Time.deltaTime * speed;
            // Clamp the desired position within the x range
            float clampedX = Mathf.Clamp(desiredPosition.x, -xRange, xRange);
            desiredPosition = new Vector3(clampedX, desiredPosition.y, desiredPosition.z);
            // Move the object to the clamped position
            transform.position = desiredPosition;
            if (Input.GetKeyDown(KeyCode.Space))
            {
                // shoot pizza
                Instantiate(ProjectilePrefab, transform.position, ProjectilePrefab.transform.rotation);
            }
        }
    }
    
    ```
    
    Animal Movement
    
    ```
    using UnityEngine;
    
    public class AnimalMovement : MonoBehaviour
    {
    
    
        public float Animal_Movement_Speed = 50.0f;
        public float lowerBound = 50;
        // Start is called before the first frame update
        void Start()
        {
    
        }
    
        // Update is called once per frame
        void Update()
        {
            transform.Translate(Vector3.forward * Time.deltaTime * Animal_Movement_Speed);
            if (transform.position.z > lowerBound)
            {
                Destroy(gameObject);
                Debug.Log("In the vernacular of your people... \n Game Over!");
            }
        }
    }
    
    ```
- 

</div></div></div>

# unity quizes (cheet sheets if fail)

# questions i got wrong on all of my unity quizzes

## <span style="font-size: 16pt; font-family: Arial; color: #000000; background-color: transparent; font-weight: 400; font-style: normal; font-variant: normal; text-decoration: none; vertical-align: baseline; white-space: pre-wrap;">Question 5</span>

<span style="font-size: 11pt; font-family: Arial; color: #000000; background-color: transparent; font-weight: 400; font-style: normal; font-variant: normal; text-decoration: none; vertical-align: baseline; white-space: pre-wrap;">If you want to move the character up continuously as the player presses the up arrow, what code would be best in the two blanks below:</span>

<span style="font-size: 11pt; font-family: Arial; color: #000000; background-color: transparent; font-weight: 400; font-style: normal; font-variant: normal; text-decoration: none; vertical-align: baseline; white-space: pre-wrap;"><span style="border: none; display: inline-block; overflow: hidden; width: 624px; height: 136px;">![](https://library.naruzkurai.tk/uploads/images/gallery/2023-05/YU9n3P1AMqkoILsp-embedded-image-2gvimi2o.png)</span></span>

<span style="font-size: 11pt; font-family: Arial; color: #000000; background-color: transparent; font-weight: 400; font-style: normal; font-variant: normal; text-decoration: none; vertical-align: baseline; white-space: pre-wrap;">GetKey(KeyCode.UpArrow)</span>

<span style="font-size: 11pt; font-family: Arial; color: #000000; background-color: transparent; font-weight: 400; font-style: normal; font-variant: normal; text-decoration: none; vertical-align: baseline; white-space: pre-wrap;">GetKeyDown(UpArrow)</span>

<span style="font-size: 11pt; font-family: Arial; color: #000000; background-color: transparent; font-weight: 400; font-style: normal; font-variant: normal; text-decoration: none; vertical-align: baseline; white-space: pre-wrap;">GetKeyUp(KeyCode.Up)</span>

<span style="font-size: 11pt; font-family: Arial; color: #000000; background-color: transparent; font-weight: 400; font-style: normal; font-variant: normal; text-decoration: none; vertical-align: baseline; white-space: pre-wrap;">GetKeyHeld(Vector3.Up)</span>

<span style="font-size: 11pt; font-family: Arial; color: #000000; background-color: transparent; font-weight: 400; font-style: normal; font-variant: normal; text-decoration: none; vertical-align: baseline; white-space: pre-wrap;">Incorrect</span>

<span style="font-size: 11pt; font-family: Arial; color: #000000; background-color: transparent; font-weight: 400; font-style: normal; font-variant: normal; text-decoration: none; vertical-align: baseline; white-space: pre-wrap;">“Input.GetKey” tests for the user holding down a key (as opposed to KeyKeyDown, which test for a single press down of a Key).</span>

## <span style="font-size: 16pt; font-family: Arial; color: #000000; background-color: transparent; font-weight: 400; font-style: normal; font-variant: normal; text-decoration: none; vertical-align: baseline; white-space: pre-wrap;">Question 10</span>

<span style="font-size: 11pt; font-family: Arial; color: #000000; background-color: transparent; font-weight: 400; font-style: normal; font-variant: normal; text-decoration: none; vertical-align: baseline; white-space: pre-wrap;">You’re trying to create some logic that will tell the user to speed up if they’re going too slow or to slow down if they’re going too fast. How should you arrange the lines of code below to accomplish that?</span>

<span style="font-size: 11pt; font-family: Arial; color: #000000; background-color: transparent; font-weight: 400; font-style: normal; font-variant: normal; text-decoration: none; vertical-align: baseline; white-space: pre-wrap;"><span style="border: none; display: inline-block; overflow: hidden; width: 624px; height: 279px;">![](https://library.naruzkurai.tk/uploads/images/gallery/2023-05/SCVquXu4s2ZnCv4Z-embedded-image-xfqhsaon.png)</span></span>

<span style="font-size: 11pt; font-family: Arial; color: #000000; background-color: transparent; font-weight: 400; font-style: normal; font-variant: normal; text-decoration: none; vertical-align: baseline; white-space: pre-wrap;">4, 6, 1, 2, 5, 9, 7, 8, 3</span>

<span style="font-size: 11pt; font-family: Arial; color: #000000; background-color: transparent; font-weight: 400; font-style: normal; font-variant: normal; text-decoration: none; vertical-align: baseline; white-space: pre-wrap;">void Update() { if (speed &lt; 10) {Debug.Log(speedUp); } else if (speed &gt; 60) { Debug.Log(slowDown); } } private float speed; private string slowDown = "Slow down!"; private string speedUp = "Speed up!";</span>

<span style="font-size: 11pt; font-family: Arial; color: #000000; background-color: transparent; font-weight: 400; font-style: normal; font-variant: normal; text-decoration: none; vertical-align: baseline; white-space: pre-wrap;">6, 1, 2, 5, 7, 8, 3, 4, 9</span>

<span style="font-size: 11pt; font-family: Arial; color: #000000; background-color: transparent; font-weight: 400; font-style: normal; font-variant: normal; text-decoration: none; vertical-align: baseline; white-space: pre-wrap;">if (speed &lt; 10) { Debug.Log(speedUp); } else if (speed &gt; 60) { Debug.Log(slowDown); } private float speed; private string slowDown = "Slow down!"; private string speedUp = "Speed up!"; void Update() { }</span>

<span style="font-size: 11pt; font-family: Arial; color: #000000; background-color: transparent; font-weight: 400; font-style: normal; font-variant: normal; text-decoration: none; vertical-align: baseline; white-space: pre-wrap;">7, 8, 3, 4, 6, 5, 2, 1, 9</span>

<span style="font-size: 11pt; font-family: Arial; color: #000000; background-color: transparent; font-weight: 400; font-style: normal; font-variant: normal; text-decoration: none; vertical-align: baseline; white-space: pre-wrap;">private float speed; private string slowDown = "Slow down!"; private string speedUp = "Speed up!"; void Update() { if (speed &lt; 10) { Debug.Log(slowDown); } else if (speed &gt; 60) { Debug.Log(speedUp); } }</span>

<span style="font-size: 11pt; font-family: Arial; color: #000000; background-color: transparent; font-weight: 400; font-style: normal; font-variant: normal; text-decoration: none; vertical-align: baseline; white-space: pre-wrap;">7, 8, 3, 4, 6, 1, 2, 5, 9</span>

<span style="font-size: 11pt; font-family: Arial; color: #000000; background-color: transparent; font-weight: 400; font-style: normal; font-variant: normal; text-decoration: none; vertical-align: baseline; white-space: pre-wrap;">private float speed; private string slowDown = "Slow down!"; private string speedUp = "Speed up!"; void Update() { if (speed &lt; 10) { Debug.Log(speedUp); } else if (speed &gt; 60) { Debug.Log(slowDown); } }</span>

<span style="font-size: 11pt; font-family: Arial; color: #000000; background-color: transparent; font-weight: 400; font-style: normal; font-variant: normal; text-decoration: none; vertical-align: baseline; white-space: pre-wrap;">Incorrect</span>

<span style="font-size: 11pt; font-family: Arial; color: #000000; background-color: transparent; font-weight: 400; font-style: normal; font-variant: normal; text-decoration: none; vertical-align: baseline; white-space: pre-wrap;">All variables should be declared first, then the void method, then the if-condition telling them to speed up, then the else condition telling them to slow down.</span>

#### Question 6

<div class="question-content" id="bkmrk-using-the-informatio"><div class="question_2_YooZuL"><div class="question-body_1x1egaVL"><div class="body-wrap_EVe_uHfH render-only_1Ju2DYiU normal"><div style="padding-top: 1px; padding-bottom: 1px;"><div><div class="DraftEditor-root"><div class="DraftEditor-editorContainer"><div class="public-DraftEditor-content" contenteditable="false" spellcheck="true" style="outline: none; white-space: pre-wrap; overflow-wrap: break-word;"><div data-contents="true"><div><div data-offset-key="canh4-0-0">  
</div><div class="" data-block="true" data-editor="editor_quiz_question_5f75f997edbc2a0022cdd0ad" data-offset-key="canh4-0-0"><div class="public-DraftStyleDefault-block public-DraftStyleDefault-ltr" data-offset-key="canh4-0-0"><span data-offset-key="canh4-0-0"><span data-text="true">Using the information shown in the autocomplete pop-up window below, which of the following would be a valid call of the Instantiate method?</span></span></div></div><div data-offset-key="4qdfc-0-0">  
</div><figure class="" contenteditable="false" data-block="true" data-editor="editor_quiz_question_5f75f997edbc2a0022cdd0ad" data-offset-key="4qdfc-0-0"><div class="public-DraftStyleDefault-block public-DraftStyleDefault-ltr" data-offset-key="4qdfc-0-0"><div class="alignment-default_3YBOBbDE normal openSettings_27-ymsLH"><div><div class="image-wrapper_1BwyB1AH render-only_3gdv1yrA"><div><div class="image-wrap_qRKH_iYn content_2_SydHMx"><div class="image_2TOsxhor image-content_59xaSqy5" draggable="false"><div class="image-wrapper_kqQYamzk" style="max-width: 100%; max-height: 100%;"><div style="padding-bottom: 32.4655%;">  
</div><div class="imageholder_3AZvfbQ0"><div class="placeholder-wrapper_2kAsug7c"><picture><source data-srcset="https://connect-prd-cdn.unity.com/20201001/learn/images/b2a0562a-375c-4917-9aa8-e17bfcc66e0c_Obj_Prog_SCE_2.4.png.200x0x1.png 200w,https://connect-prd-cdn.unity.com/20201001/learn/images/b2a0562a-375c-4917-9aa8-e17bfcc66e0c_Obj_Prog_SCE_2.4.png.400x0x1.png 400w,https://connect-prd-cdn.unity.com/20201001/learn/images/b2a0562a-375c-4917-9aa8-e17bfcc66e0c_Obj_Prog_SCE_2.4.png.600x0x1.png 600w,https://connect-prd-cdn.unity.com/20201001/learn/images/b2a0562a-375c-4917-9aa8-e17bfcc66e0c_Obj_Prog_SCE_2.4.png.800x0x1.png 800w,https://connect-prd-cdn.unity.com/20201001/learn/images/b2a0562a-375c-4917-9aa8-e17bfcc66e0c_Obj_Prog_SCE_2.4.png.1000x0x1.png 1000w,https://connect-prd-cdn.unity.com/20201001/learn/images/b2a0562a-375c-4917-9aa8-e17bfcc66e0c_Obj_Prog_SCE_2.4.png.1200x0x1.png 1200w,https://connect-prd-cdn.unity.com/20201001/learn/images/b2a0562a-375c-4917-9aa8-e17bfcc66e0c_Obj_Prog_SCE_2.4.png.1400x0x1.png 1400w,https://connect-prd-cdn.unity.com/20201001/learn/images/b2a0562a-375c-4917-9aa8-e17bfcc66e0c_Obj_Prog_SCE_2.4.png.1600x0x1.png 1600w,https://connect-prd-cdn.unity.com/20201001/learn/images/b2a0562a-375c-4917-9aa8-e17bfcc66e0c_Obj_Prog_SCE_2.4.png.1800x0x1.png 1800w,https://connect-prd-cdn.unity.com/20201001/learn/images/b2a0562a-375c-4917-9aa8-e17bfcc66e0c_Obj_Prog_SCE_2.4.png.2000x0x1.png 2000w" sizes="100vw" srcset="https://connect-prd-cdn.unity.com/20201001/learn/images/b2a0562a-375c-4917-9aa8-e17bfcc66e0c_Obj_Prog_SCE_2.4.png.200x0x1.png 200w,https://connect-prd-cdn.unity.com/20201001/learn/images/b2a0562a-375c-4917-9aa8-e17bfcc66e0c_Obj_Prog_SCE_2.4.png.400x0x1.png 400w,https://connect-prd-cdn.unity.com/20201001/learn/images/b2a0562a-375c-4917-9aa8-e17bfcc66e0c_Obj_Prog_SCE_2.4.png.600x0x1.png 600w,https://connect-prd-cdn.unity.com/20201001/learn/images/b2a0562a-375c-4917-9aa8-e17bfcc66e0c_Obj_Prog_SCE_2.4.png.800x0x1.png 800w,https://connect-prd-cdn.unity.com/20201001/learn/images/b2a0562a-375c-4917-9aa8-e17bfcc66e0c_Obj_Prog_SCE_2.4.png.1000x0x1.png 1000w,https://connect-prd-cdn.unity.com/20201001/learn/images/b2a0562a-375c-4917-9aa8-e17bfcc66e0c_Obj_Prog_SCE_2.4.png.1200x0x1.png 1200w,https://connect-prd-cdn.unity.com/20201001/learn/images/b2a0562a-375c-4917-9aa8-e17bfcc66e0c_Obj_Prog_SCE_2.4.png.1400x0x1.png 1400w,https://connect-prd-cdn.unity.com/20201001/learn/images/b2a0562a-375c-4917-9aa8-e17bfcc66e0c_Obj_Prog_SCE_2.4.png.1600x0x1.png 1600w,https://connect-prd-cdn.unity.com/20201001/learn/images/b2a0562a-375c-4917-9aa8-e17bfcc66e0c_Obj_Prog_SCE_2.4.png.1800x0x1.png 1800w,https://connect-prd-cdn.unity.com/20201001/learn/images/b2a0562a-375c-4917-9aa8-e17bfcc66e0c_Obj_Prog_SCE_2.4.png.2000x0x1.png 2000w" type="image/png"><source data-srcset="https://connect-prd-cdn.unity.com/20201001/learn/images/b2a0562a-375c-4917-9aa8-e17bfcc66e0c_Obj_Prog_SCE_2.4.png.200x0x1.webp 200w,https://connect-prd-cdn.unity.com/20201001/learn/images/b2a0562a-375c-4917-9aa8-e17bfcc66e0c_Obj_Prog_SCE_2.4.png.400x0x1.webp 400w,https://connect-prd-cdn.unity.com/20201001/learn/images/b2a0562a-375c-4917-9aa8-e17bfcc66e0c_Obj_Prog_SCE_2.4.png.600x0x1.webp 600w,https://connect-prd-cdn.unity.com/20201001/learn/images/b2a0562a-375c-4917-9aa8-e17bfcc66e0c_Obj_Prog_SCE_2.4.png.800x0x1.webp 800w,https://connect-prd-cdn.unity.com/20201001/learn/images/b2a0562a-375c-4917-9aa8-e17bfcc66e0c_Obj_Prog_SCE_2.4.png.1000x0x1.webp 1000w,https://connect-prd-cdn.unity.com/20201001/learn/images/b2a0562a-375c-4917-9aa8-e17bfcc66e0c_Obj_Prog_SCE_2.4.png.1200x0x1.webp 1200w,https://connect-prd-cdn.unity.com/20201001/learn/images/b2a0562a-375c-4917-9aa8-e17bfcc66e0c_Obj_Prog_SCE_2.4.png.1400x0x1.webp 1400w,https://connect-prd-cdn.unity.com/20201001/learn/images/b2a0562a-375c-4917-9aa8-e17bfcc66e0c_Obj_Prog_SCE_2.4.png.1600x0x1.webp 1600w,https://connect-prd-cdn.unity.com/20201001/learn/images/b2a0562a-375c-4917-9aa8-e17bfcc66e0c_Obj_Prog_SCE_2.4.png.1800x0x1.webp 1800w,https://connect-prd-cdn.unity.com/20201001/learn/images/b2a0562a-375c-4917-9aa8-e17bfcc66e0c_Obj_Prog_SCE_2.4.png.2000x0x1.webp 2000w" sizes="100vw" srcset="https://connect-prd-cdn.unity.com/20201001/learn/images/b2a0562a-375c-4917-9aa8-e17bfcc66e0c_Obj_Prog_SCE_2.4.png.200x0x1.webp 200w,https://connect-prd-cdn.unity.com/20201001/learn/images/b2a0562a-375c-4917-9aa8-e17bfcc66e0c_Obj_Prog_SCE_2.4.png.400x0x1.webp 400w,https://connect-prd-cdn.unity.com/20201001/learn/images/b2a0562a-375c-4917-9aa8-e17bfcc66e0c_Obj_Prog_SCE_2.4.png.600x0x1.webp 600w,https://connect-prd-cdn.unity.com/20201001/learn/images/b2a0562a-375c-4917-9aa8-e17bfcc66e0c_Obj_Prog_SCE_2.4.png.800x0x1.webp 800w,https://connect-prd-cdn.unity.com/20201001/learn/images/b2a0562a-375c-4917-9aa8-e17bfcc66e0c_Obj_Prog_SCE_2.4.png.1000x0x1.webp 1000w,https://connect-prd-cdn.unity.com/20201001/learn/images/b2a0562a-375c-4917-9aa8-e17bfcc66e0c_Obj_Prog_SCE_2.4.png.1200x0x1.webp 1200w,https://connect-prd-cdn.unity.com/20201001/learn/images/b2a0562a-375c-4917-9aa8-e17bfcc66e0c_Obj_Prog_SCE_2.4.png.1400x0x1.webp 1400w,https://connect-prd-cdn.unity.com/20201001/learn/images/b2a0562a-375c-4917-9aa8-e17bfcc66e0c_Obj_Prog_SCE_2.4.png.1600x0x1.webp 1600w,https://connect-prd-cdn.unity.com/20201001/learn/images/b2a0562a-375c-4917-9aa8-e17bfcc66e0c_Obj_Prog_SCE_2.4.png.1800x0x1.webp 1800w,https://connect-prd-cdn.unity.com/20201001/learn/images/b2a0562a-375c-4917-9aa8-e17bfcc66e0c_Obj_Prog_SCE_2.4.png.2000x0x1.webp 2000w" type="image/webp">![](https://connect-prd-cdn.unity.com/20201001/learn/images/b2a0562a-375c-4917-9aa8-e17bfcc66e0c_Obj_Prog_SCE_2.4.png)</source></source></picture></div></div></div><div class="fullscreen-expand_39podtJs"><div class="ifont icons-expand_1HwYYwwL ifont-icons-fullscreen">  
</div>Select image to expand</div></div></div></div></div></div></div></div></figure></div></div></div></div></div></div></div></div></div><div class="options_2C6jnDKr"><div class="option-item_1Fb_1Jne"><div class="checkbox-wrap_3Hx113m8"><div class="checkbox_mk6-L479"><div class="check-icon_3-wKz0tL passive_2hEikiew">  
</div></div></div><div class="option-text_S9LG7Hui"><div class="body-wrap_EVe_uHfH render-only_1Ju2DYiU quiz-option_3vqjzjYt"><div style="padding-top: 1px; padding-bottom: 1px;"><div><div class="DraftEditor-root"><div class="DraftEditor-editorContainer"><div class="public-DraftEditor-content" contenteditable="false" spellcheck="true" style="outline: none; white-space: pre-wrap; overflow-wrap: break-word;"><div data-contents="true"><div><div data-offset-key="c9j4m-0-0">  
</div><div class="" data-block="true" data-editor="editor_quiz_question_option_5f75f997edbc2a0022cdd0ae" data-offset-key="c9j4m-0-0"><div class="public-DraftStyleDefault-block public-DraftStyleDefault-ltr" data-offset-key="c9j4m-0-0"><span data-offset-key="c9j4m-0-0"><span data-text="true">Instantiate(objectPrefab.transform, spawner, true);</span></span></div></div></div></div></div></div></div></div></div></div></div></div><div class="option-item_1Fb_1Jne"><div class="checkbox-wrap_3Hx113m8"><div class="checkbox_mk6-L479"><div class="check-icon_3-wKz0tL passive_2hEikiew">  
</div></div></div><div class="option-text_S9LG7Hui"><div class="body-wrap_EVe_uHfH render-only_1Ju2DYiU quiz-option_3vqjzjYt"><div style="padding-top: 1px; padding-bottom: 1px;"><div><div class="DraftEditor-root"><div class="DraftEditor-editorContainer"><div class="public-DraftEditor-content" contenteditable="false" spellcheck="true" style="outline: none; white-space: pre-wrap; overflow-wrap: break-word;"><div data-contents="true"><div><div data-offset-key="79m8c-0-0">  
</div><div class="" data-block="true" data-editor="editor_quiz_question_option_5f75f997edbc2a0022cdd0af" data-offset-key="79m8c-0-0"><div class="public-DraftStyleDefault-block public-DraftStyleDefault-ltr" data-offset-key="79m8c-0-0"><span data-offset-key="79m8c-0-0"><span data-text="true">Instantiate(objectPrefab, spawner, false);</span></span></div></div></div></div></div></div></div></div></div></div></div></div><div class="option-item_1Fb_1Jne"><div class="checkbox-wrap_3Hx113m8"><div class="checkbox_mk6-L479"><div class="check-icon_3-wKz0tL passive_2hEikiew">  
</div></div></div><div class="option-text_S9LG7Hui"><div class="body-wrap_EVe_uHfH render-only_1Ju2DYiU quiz-option_3vqjzjYt"><div style="padding-top: 1px; padding-bottom: 1px;"><div><div class="DraftEditor-root"><div class="DraftEditor-editorContainer"><div class="public-DraftEditor-content" contenteditable="false" spellcheck="true" style="outline: none; white-space: pre-wrap; overflow-wrap: break-word;"><div data-contents="true"><div><div data-offset-key="2i4h9-0-0">  
</div><div class="" data-block="true" data-editor="editor_quiz_question_option_5f75f997edbc2a0022cdd0b0" data-offset-key="2i4h9-0-0"><div class="public-DraftStyleDefault-block public-DraftStyleDefault-ltr" data-offset-key="2i4h9-0-0"><span data-offset-key="2i4h9-0-0"><span data-text="true">Instantiate(objectPrefab, spawner.transform, true);</span></span></div></div></div></div></div></div></div></div></div></div></div></div><div class="option-item_1Fb_1Jne"><div class="checkbox-wrap_3Hx113m8"><div class="checkbox_mk6-L479"><div class="incorrect-icon_2FGQUNIe small_MwThHkB7"><div class="line_2cwjD7RK">  
</div></div></div></div><div class="option-text_S9LG7Hui"><div class="body-wrap_EVe_uHfH render-only_1Ju2DYiU quiz-option_3vqjzjYt"><div style="padding-top: 1px; padding-bottom: 1px;"><div><div class="DraftEditor-root"><div class="DraftEditor-editorContainer"><div class="public-DraftEditor-content" contenteditable="false" spellcheck="true" style="outline: none; white-space: pre-wrap; overflow-wrap: break-word;"><div data-contents="true"><div><div data-offset-key="3mj6m-0-0">  
</div><div class="" data-block="true" data-editor="editor_quiz_question_option_5f75f997edbc2a0022cdd0b1" data-offset-key="3mj6m-0-0"><div class="public-DraftStyleDefault-block public-DraftStyleDefault-ltr" data-offset-key="3mj6m-0-0"><span data-offset-key="3mj6m-0-0"><span data-text="true">Instantiate(objectPrefab, spawner, bool);</span></span></div></div></div></div></div></div></div></div></div></div></div></div></div><div class="feedback_1Qoim1cl"><div class="feedback_icon_28-yYHsF"><div class="icon_2Ovwbc90 ifont ifont-icon-like incorrect_3H5BZFB_">  
</div></div><div class="feedback_text_3Tujxoqh"><div class="tip-text_1M1x6Bzn incorrect_3H5BZFB_">Incorrect</div><div class="body-wrap_176taP6A render-only_3LFn_jOO question-option_1sgoRpe2"><div><div class="DraftEditor-root"><div class="DraftEditor-editorContainer"><div class="public-DraftEditor-content" contenteditable="false" spellcheck="true" style="outline: none; white-space: pre-wrap; overflow-wrap: break-word;"><div data-contents="true"><div><div data-offset-key="b0000-0-0">  
</div><div class="" data-block="true" data-editor="editorQuizQuestionFeedback_5f75f997edbc2a0022cdd0ad" data-offset-key="b0000-0-0"><div class="public-DraftStyleDefault-block public-DraftStyleDefault-ltr" data-offset-key="b0000-0-0"><span data-offset-key="b0000-0-0"><span data-text="true">You can see from the tooltip that the Instantiate method can receive 3 parameters with types in the following order: Object, Transform, bool. That means that the first parameter can be an object (objectPrefab) the second can be a transform of an object (spawner.transform) and the third must be a bool value (e.g. true or false).</span></span></div></div><div data-offset-key="9os23-0-0">  
</div><div class="" data-block="true" data-editor="editorQuizQuestionFeedback_5f75f997edbc2a0022cdd0ad" data-offset-key="9os23-0-0"><div class="public-DraftStyleDefault-block public-DraftStyleDefault-ltr" data-offset-key="9os23-0-0"><span data-offset-key="9os23-0-0">  
</span></div></div></div></div></div></div></div></div></div></div></div></div></div>

# Lab 2 - New Project with Primitives

#### 1.Create a new Unity Project and rename your scene   


"<span style="font-style:italic;"><span>Just like we did with the Prototype, the first thing we need to do is create a new blank project "</span></span>

1. [<span style="text-decoration:underline;"><span>Create a new Unity project</span></span>](https://learn.unity.com/tutorial/project-setup-processes#60f6aedeedbc2a7e96802196) <span><span>called “Personal Project” using the </span></span><span style="font-weight:bold;"><span>3D template</span></span><span><span> and setting the location to the “</span></span><span style="font-weight:bold;"><span>Create with Code</span></span><span><span>” folder</span></span>
2. <div class="public-DraftStyleDefault-block public-DraftStyleDefault-ltr"><span><span>After Unity opens, select your custom </span></span><span style="font-weight:bold;"><span>Layout</span></span></div>
3. <div class="public-DraftStyleDefault-block public-DraftStyleDefault-ltr"><span><span>In the Project window, </span></span><span style="font-style:italic;"><span>Assets &gt; Scenes</span></span><span><span>, rename “</span></span><span style="font-weight:bold;"><span>SampleScene</span></span><span><span>” to “My Game” </span></span></div>

#### <span><span>2.Create a background plane</span></span>

*<span><span>"To orient yourself in the scene and not feel like you’re floating around in mid-air, it’s always good to start by adding a background / ground object"</span></span>*

1. <div class="public-DraftStyleDefault-block public-DraftStyleDefault-ltr"><span><span>In the Hierarchy, </span></span><span style="font-style:italic;"><span>Right-click &gt; 3D Object &gt; </span></span><span style="font-style:italic;font-weight:bold;"><span>Plane</span></span><span><span> to add a plane to your scene </span></span></div>
2. <span><span>In the Plane’s Inspector, in the top-right of the Transform component, click on the three dots icon</span></span><span style="font-weight:bold;font-style:italic;"><span> &gt; Reset</span></span>
    1. <span style="font-weight:bold;"><span>Note</span></span><span><span>: the three dots will appear as a gear icon in older versions of Unity.</span></span>
3. <div class="public-DraftStyleDefault-block public-DraftStyleDefault-ltr"><span><span>Increase the </span></span><span style="font-weight:bold;"><span>XYZ scale</span></span><span><span> of the plane to (</span></span><span style="text-decoration:underline;"><span>5, 1, 5</span></span><span><span>)</span></span></div>
4. <div class="public-DraftStyleDefault-block public-DraftStyleDefault-ltr"><span><span>Adjust your position in Scene view so you have a good view of the Plane</span></span></div>

#### <span><span>3.Create primitive Player with a new material</span></span>

*<span><span> "Now that we have the empty plane object set up, we can add the star of the show: the player object"</span></span>*

1. <div class="public-DraftStyleDefault-block public-DraftStyleDefault-ltr"><span><span>In the Hierarchy, </span></span><span style="font-style:italic;"><span>Right-click &gt; 3D Object &gt; </span></span><span style="font-style:italic;font-weight:bold;"><span>Sphere</span></span><span style="font-weight:bold;"><span>, </span></span><span><span>then rename it “</span></span><span style="text-decoration:underline;"><span>Player</span></span><span><span>”</span></span></div>
2. <div class="public-DraftStyleDefault-block public-DraftStyleDefault-ltr"><span><span>In Assets, </span></span><span style="font-style:italic;"><span>Right-click &gt; Create &gt; </span></span><span style="font-style:italic;font-weight:bold;"><span>Folder</span></span><span><span> named “</span></span><span style="text-decoration:underline;"><span>Materials</span></span><span><span>”</span></span></div>
3. <div class="public-DraftStyleDefault-block public-DraftStyleDefault-ltr"><span><span>Inside “Materials”, </span></span><span style="font-style:italic;"><span>Right-click &gt; Create &gt; </span></span><span style="font-style:italic;font-weight:bold;"><span>Material</span></span><span><span> and rename it “</span></span><span style="text-decoration:underline;"><span>Blue</span></span><span><span>”</span></span></div>
4. <div class="public-DraftStyleDefault-block public-DraftStyleDefault-ltr"><span><span>In Blue’s Inspector, click on the </span></span><span style="font-weight:bold;"><span>Albedo color </span></span><span><span>box and change it to a blue</span></span></div>
5. <div class="public-DraftStyleDefault-block public-DraftStyleDefault-ltr"><span style="font-weight:bold;"><span>Drag</span></span><span><span> the material from your Assets onto the Player object</span></span></div>

#### <span><span>4.Position camera based on project type</span></span>

*<span><span> "Now that we have the player in there, we need the best view of it, depending on our type of project"</span></span>*

1. <div class="public-DraftStyleDefault-block public-DraftStyleDefault-ltr"><span><span>For a</span></span><span style="font-weight:bold;"><span> top-down</span></span><span><span> game, position the camera at (</span></span><span style="text-decoration:underline;"><span>0, 10, 0</span></span><span><span>) directly over the player and rotate it </span></span><span style="text-decoration:underline;"><span>90</span></span><span><span> degrees on the </span></span><span style="font-weight:bold;"><span>X axis</span></span></div>
2. <div class="public-DraftStyleDefault-block public-DraftStyleDefault-ltr"><span><span>For a </span></span><span style="font-weight:bold;"><span>side-view</span></span><span><span> game, rotate the </span></span><span style="font-weight:bold;"><span>Plane</span></span><span><span> by </span></span><span style="text-decoration:underline;"><span>-90</span></span><span><span> degrees on the </span></span><span style="font-weight:bold;"><span>X axis</span></span></div>
3. <div class="public-DraftStyleDefault-block public-DraftStyleDefault-ltr"><span><span>For an </span></span><span style="font-weight:bold;"><span>third-person</span></span><span><span> view game, move the camera up on the </span></span><span style="font-weight:bold;"><span>Y and Z axes</span></span><span><span> and increase its </span></span><span style="font-weight:bold;"><span>rotation on the X axis</span></span></div>

#### <span>5.Enemies, obstacles, projectiles &amp; materials</span>

<span> *"Now that we know how to make primitives, let’s go ahead and make one for each object in our project"*</span>

1. <div class="public-DraftStyleDefault-block public-DraftStyleDefault-ltr"><span><span>In the Hierarchy, create new </span></span><span style="font-weight:bold;"><span>Cubes</span></span><span><span>, </span></span><span style="font-weight:bold;"><span>Spheres</span></span><span><span>, and </span></span><span style="font-weight:bold;"><span>Capsules</span></span><span><span> for all other main objects, </span></span><span style="font-weight:bold;"><span>renaming</span></span><span><span> them, </span></span><span style="font-weight:bold;"><span>repositioning</span></span><span><span> them, and </span></span><span style="font-weight:bold;"><span>scaling</span></span><span><span> them</span></span></div>
2. <div class="public-DraftStyleDefault-block public-DraftStyleDefault-ltr"><span><span>In your Materials folder, create </span></span><span style="font-weight:bold;"><span>new materials</span></span><span><span> for as many colors as you have unique objects, editing their color to match their name, then </span></span><span style="font-weight:bold;"><span>apply</span></span><span><span> those materials to your objects</span></span></div>
3. <div class="public-DraftStyleDefault-block public-DraftStyleDefault-ltr"><span><span>Position all of your objects in locations relative to each other that make sense</span></span>  
      
    </div>

#### 6.Export a Unity Package backup file

 *"Since we’re going to be putting our hearts and souls into this project, it’s always good to make backups"*

1. <div class="public-DraftStyleDefault-block public-DraftStyleDefault-ltr"><span style="font-weight:bold;"><span>Save</span></span><span><span> your Scene</span></span></div>
2. <div class="public-DraftStyleDefault-block public-DraftStyleDefault-ltr"><span><span>In the Project window, Right-click on the </span></span><span style="font-style:italic;"><span>“Assets” folder &gt; </span></span><span style="font-style:italic;font-weight:bold;"><span>Export Package</span></span><span><span>, then click Export</span></span></div>
3. <div class="public-DraftStyleDefault-block public-DraftStyleDefault-ltr"><span><span>Create a </span></span><span style="font-weight:bold;"><span>new “</span></span><span style="font-weight:bold;text-decoration:underline;"><span>Backups</span></span><span style="font-weight:bold;"><span>” folder</span></span><span><span> in your Personal Project folder, then </span></span><span style="font-weight:bold;"><span>save</span></span><span><span> it with your name and the version number (e.g. Carl\_V0.1.unitypackage”)</span></span></div>

#### 7.Lesson Recap

<div id="bkmrk-new-progress-new-pro"><div><div class="public-DraftStyleDefault-block public-DraftStyleDefault-ltr"><span><span>New progress</span></span></div><div class="public-DraftStyleDefault-block public-DraftStyleDefault-ltr" style="padding-left:40px;">- <span><span>New project for your Personal Project</span></span>
- <span><span>Camera positioned and rotated based on project type</span></span>
- <span><span>All key objects in scene with unique materials</span></span>

</div></div></div><div id="bkmrk-new-concepts-%26-skill"><div class="public-DraftStyleDefault-block public-DraftStyleDefault-ltr"><span><span>New concepts &amp; skills: </span></span></div><div class="public-DraftStyleDefault-block public-DraftStyleDefault-ltr" style="padding-left:40px;">- <span>Primitives</span>
- <div class="public-DraftStyleDefault-block public-DraftStyleDefault-ltr"><span><span>Create new materials</span></span></div>
- <span>Export Unity packages</span>

</div></div>

# Mod the Cube

Summary : In this exercise, you'll be challenged to modify a provided script to change the behavior of an object it's applied to.

<details id="bkmrk-type%3Atutorial-level%3A"><summary></summary>

<div class="subtitle-item_xpaEsup9">Type:Tutorial</div><div class="subtitle-item_xpaEsup9"><div class="dot_2bxnxodK">  
</div>Level:Beginner</div><div class="subtitle-item_xpaEsup9"><div class="dot_2bxnxodK">  
</div><div class="tag_1zONFo0R tag-points">Xp: 60  
</div></div><div class="subtitle-item_xpaEsup9"><div class="duration-label_68-m16F8"></div><div class="duration-label_68-m16F8"><span class="minute">Estimated time to complete: 30 Mins  
  
Materials: [ModTheCubeChallengeAssets.zip](https://connect-prd-cdn.unity.com/20201026/b3aa8c3a-1cb7-49eb-b835-aa4eefc8b1e0/ModTheCubeChallengeAssets.zip)</span></div></div><div class="duration-label_68-m16F8">  
</div><div class="duration-label_68-m16F8">  
</div></details>#### 1.Overview

In this mission you learned how to open, read, and modify scripts. You practiced fundamental programming challenges, and hopefully you’re starting to feel comfortable with basic scripting. In this exercise, you’ll be tasked with modifying the behavior of an already existing script. We’re leaving this challenge open-ended, so now’s the time to get creative!

#### 2.Download the provided assets and import them into a new Unity Project

1. <span><span>Download </span></span>[<span style="text-decoration:underline;"><span>ModTheCubeChallengeAssets.zip</span></span>](https://connect-prd-cdn.unity.com/20201026/b3aa8c3a-1cb7-49eb-b835-aa4eefc8b1e0/ModTheCubeChallengeAssets.zip?_ga=2.132173388.37272804.1639415162-1635354840.1616306530)<span><span>.</span></span>
2. <span><span>To unzip the contents of the folder, right-click the folder and select </span></span><span style="font-weight:bold;"><span>Extract All</span></span><span><span> (macOS: double-click the zipped folder). Inside you will find ModTheCube.unitypackage.  
      
    </span></span><div><div class="public-DraftStyleDefault-block public-DraftStyleDefault-ltr" style="padding-left:40px;"><span style="font-weight:bold;"><span>Note: </span></span><span><span>While it is possible to view the contents of a folder while it’s still zipped, the data is still compressed. Attempting to import the contents of the ModThCubeChallengeAssets folder while it’s still zipped will result in an error message in Unity. Ensure that you have unzipped the folder before proceeding to the next step.</span></span></div></div>
3. [<span style="text-decoration:underline;"><span>Create a new Unity project</span></span>](https://learn.unity.com/tutorial/project-setup-processes#60f6aedeedbc2a7e96802196)<span><span> using the 3D template - remember to use one of the supported versions of Unity (2018.4LTS, 2019.4LTS, or 2020.3LTS).</span></span>
4. [<span style="text-decoration:underline;"><span>Import</span></span>](https://learn.unity.com/tutorial/project-setup-processes#60ed7a91edbc2a002096b762)<span><span> ModTheCube.unitypackage into your new 3D template project.</span></span>

#### 3.Observe the default script functionality

<span><span>Before you begin editing the code, take a few minutes to understand what the script does by default. The imported .unitypackage contains three items: a C# script, a material, and a scene.</span></span>

1. <span><span>Open the scene located in the ModTheCube folder. </span></span><span><span><span>  
    </span></span></span>[![image.png](https://library.naruzkurai.com/uploads/images/gallery/2023-06/scaled-1680-/KrH0KYxBLzveE7KR-image.png)
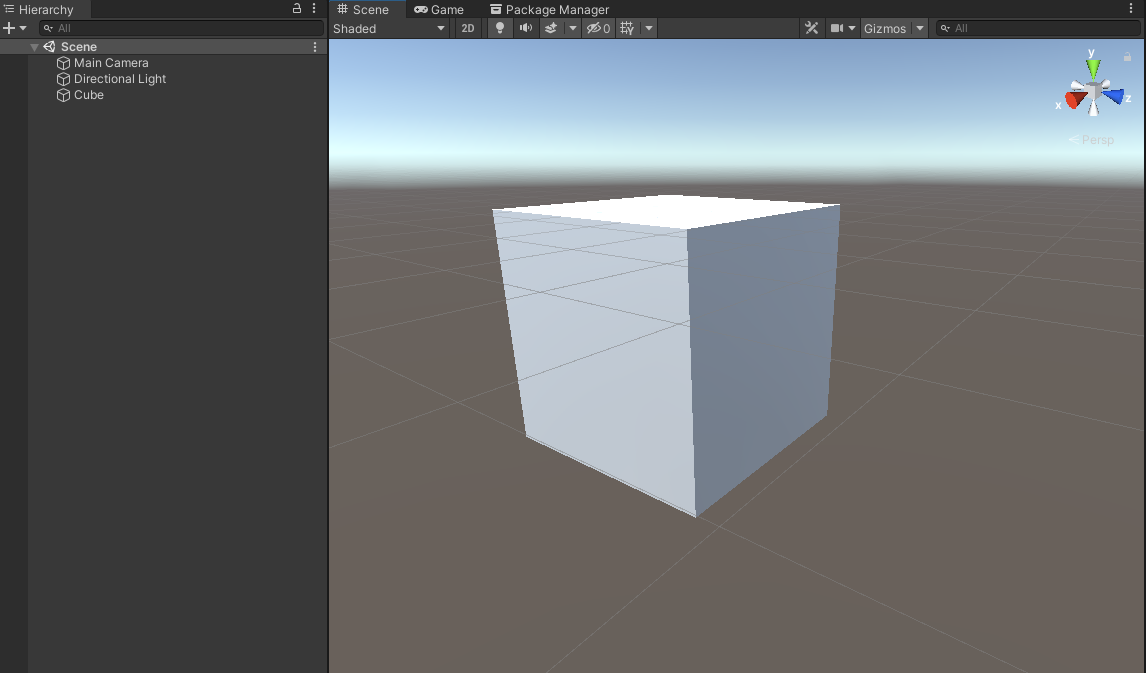
](https://library.naruzkurai.com/uploads/images/gallery/2023-06/KrH0KYxBLzveE7KR-image.png)
    
    <span><span>  
    <span>The only thing in the scene aside from the Camera and Directional Light is a cube. Attached to the cube is the script you will be modifying.</span>  
    </span></span>
2. <span><span>Enter Play mode (select the play button on the toolbar) and observe the default behavior of the script assigned to the cube.  
    </span></span><span><span>When you enter Play mode, you will observe several of the cube’s properties change. All of these changes are hardcoded into the cube.cs script attached to the cube in the scene. This means that the cube will be modified in the same way each time the scene is run.</span></span>

####   


#### 4.Modify the cube.cs script

<span><span>Now that you understand what the cube script is doing, you can begin to customize it. As previously mentioned, all of the changes the script is making to the cube are specified in the code. It would be easier to control the cube from the Unity Editor instead of editing the script. You can make this possible by changing variables to be public. Public variables appear in the Inspector window where you can modify their values.</span></span>

1. Open the cube.cs script in your code editor and observe the code.
2. Identify at least two changes that you can make to the cube’s behavior. 
    - <span><span>Change the cube's location (transform).  
        </span></span>
    - <span><span><span>Change the cube's scale.</span></span></span>
    - <span><span><span><span>Change the angle at which the cube rotates.</span></span></span></span>
    - <span><span><span><span><span>Change the cube’s rotation speed.</span></span></span></span></span>
    - <span><span><span><span><span><span>Change the cube’s material color.</span></span></span></span></span></span>
    - <span><span><span><span><span><span><span>Change the cube’s material opacity.</span></span></span></span></span></span></span><span><span><span><span><span><span><span>If you’re feeling confident, you can attempt the following as well:</span></span></span></span></span></span></span>
    - <span><span><span><span><span><span><span>Modify any of the changes above so they change randomly each time the scene is played.</span></span></span></span></span></span></span>
    - <span><span><span><span><span><span><span><span>Add extra functionality to the cube. For example, how might you change the color of the cube over time?</span></span></span></span></span></span></span></span>
3. <span><span>Implement your planned changes in the code.</span></span>
4. <span><span>Test the scene regularly as you work to ensure your code is performing as expected. </span></span>

#### 5.Create a WebGL project showing off your modded cube

<span><span>Now that you have edited your script and thoroughly tested your changes, your remaining task is to submit your project here and show off your work! You will create a WebGL build of your project, upload it to Unity Play, and then complete this challenge by linking your submission below. </span></span>

1. <span><span>If you haven’t already done so, frame your camera in the scene so it’s easy to see the cube in the Play view.</span></span>
2. <span><span>Save your scene.</span></span>
3. <span><span>Ensure that your version of Unity has WebGL installed. Not sure if it does, or don’t know how to add it? Refer to step 2 of the </span></span>[<span style="text-decoration:underline;"><span>Create and publish WebGL Builds</span></span>](https://learn.unity.com/tutorial/creating-and-publishing-webgl-builds#601abb0cedbc2a0027bad0e3)<span><span> tutorial.</span></span>
4. <span><span> Install the WebGL Publisher package. This package will allow you to easily publish your project on Unity Play. If you aren’t sure if you have the package or don’t know how to add it, refer to the tutorial linked in the step above.</span></span>
5. <span><span>Create a WebGL build of your project. This may take a few minutes, depending on your computer. If you need help creating the build, refer to step 4 of </span></span>[<span style="text-decoration:underline;"><span>Create and publish WebGL builds</span></span>](https://learn.unity.com/tutorial/creating-and-publishing-webgl-builds#601abbf4edbc2a00203665e6)<span><span>.</span></span>
6. <span><span>Publish your WebGL build on Unity Play. If you need help publishing on Unity Play, refer to step 6 of </span></span>[<span style="text-decoration:underline;"><span>Create and publish WebGL builds</span></span>](https://learn.unity.com/tutorial/creating-and-publishing-webgl-builds#601abce4edbc2a00214a1278)<span><span>.</span></span>
7. <span><span>Copy your Unity Play link, and paste it below! </span></span>

#### 6.Criteria

<span><span>You’ll know you’re successful if you’ve met these criteria:</span></span>

- <span><span>You’ve modified the cube script so that at least two changes are made to the cube’s behavior.</span></span>
- <span><span>You’ve created a WebGL build of your project.</span></span>
- <span><span>You’ve uploaded the WebGL build to Unity Play.</span></span>
- <span><span>You’ve copied your Unity Play link for submission.</span></span>

#### 7.Next steps  


<span><span>Congratulations on completing the first mission in Junior Programmer! You now have a strong foundational understanding of the structure of basic scripts and how to make simple modifications. As you continue through the pathway, consider taking time to think about how you might modify other scripts you encounter to customize them to your liking. Sometimes the best way to reinforce what you’ve learned is to apply it in different ways on your own! </span></span>

#### 8.Submission

  
<span><span>Paste your Unity Play link below! </span></span>  
[link to the original unity course](https://learn.unity.com/tutorial/mod-the-cube?uv=2021.3&labelRequired=true&pathwayId=5f7e17e1edbc2a5ec21a20af&missionId=5f71fe63edbc2a00200e9de0 "link to unity course")

<div class="left-column_1GmmpXrG middle-column-overview" id="bkmrk--1"><div class="section-wrap_33eSsj8g download-wrap_b9v8upbH default">  
</div></div>