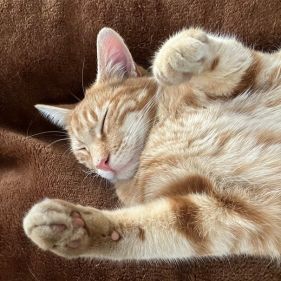
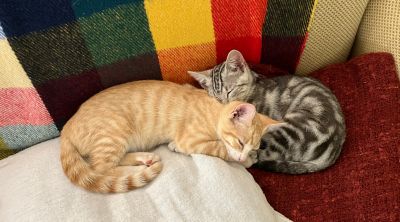
# [ACTIVE] FreeCodeCamp # Building a cat photo app: Responsive web design CatPhotoApp
# CatPhotoApp
## Cat Photos See more [cat photos](https://freecatphotoapp.com) in our gallery. [![A cute orange cat lying on its back.](https://cdn.freecodecamp.org/curriculum/cat-photo-app/relaxing-cat.jpg)](https://freecatphotoapp.com)
## Cat Lists ### Things cats love: - cat nip - laser pointers - lasagna
![A slice of lasagna on a plate.](https://cdn.freecodecamp.org/curriculum/cat-photo-app/lasagna.jpg)
Cats *love* lasagna.
### Top 3 things cats hate: 1. flea treatment 2. thunder 3. other cats
![Five cats looking around a field.](https://cdn.freecodecamp.org/curriculum/cat-photo-app/cats.jpg)
Cats **hate** other cats.
## Cat Form
Is your cat an indoor or outdoor cat?
What's your cat's personality? [x] [ ] [ ]
# Learn Basic CSS by Building a Cafe Menu # notes, (needs to be manually updated from time to time) -Key: - Red: Important Concepts to understand - Pink: Important technical keywords - Blue: Sections of notes - Green: Examples and explanations HTML 5 Elements and Syntax Heading - Syntax - <h#>Content</h#> - The lower header has the highest value (h1 > h2) - There can be multiple headers of the same value Important: The implication of Paragraph - Syntax - <p>Content</p> Commenting - Syntax - <!-- Content → Main - Syntax - <main> Content </main> - Propose: Represents the main body of an HTML document, helps make it easier to read and helps with SEO (Search Engine Optimization) Important: All content within main (Headings, Paragraphs, Comments, etc) should be nested (indented two spaces further to the right of the element they are nested in) Ex: <main> \_\_Content </main> Images - Syntax - <img src=”(URL)” alt=”(Error Message)> - Images utilize a self closing tag (A tag without a closing tag) - The src (source) attribute specifies the images URL, aka where it is located - The alt attribute displays text that improves user understanding and accessibility if the image fails to load Anchor - Syntax - <a href=”(URL)” target=”(Target)”>(Text)</a> - An anchor element adds a link to another page - The text is a message that will embody the link on the page of a website and will be placed between the opening and closing tags on an anchor element - href (hypertext reference) is a hyperlink to another web address - target specifies where to open the contents of the hyperlink (\_blank specifies the link should open in a new tab or window) Important: You can utilize anchor within other elements Ex: <p>See more <a href=”(URL)”>photos</a> in our gallery.<p> Explanation: In the above example, the hyperlink is embedded into the word “photos” within the paragraph. Ex: <a href=”example-link”> <img src=”image-link.jpg” alt=”A photo.”> </a> Explanation: In the above example, the image is wrapped in the anchor element, making it so the image embodies the hyperlink Section - Syntax - <section> Content </section> - The section element is used to define the sections in a document, such as chapters, headers, footers, or any other sections of the document (helps with SEO and accessibility) Ordered List/Unordered List - Syntax - <ul> <li>list contents</li> </ul> - <ol> <li>list contents</li> </ol> - ul specifies an unordered list while ol specifies an ordered list, li specifies elements within the list Figure/Fig Caption - Syntax - <figure> <img src=”(URL)” alt=”(Text)”> <figcaption>Text</figcaption> </figure> - The figure element is used to specify self contained content Emphasis/Strong - Syntax - <em>Text</em> - <strong>Text</strong> - The em puts emphasis on specific words or phrases with italics, strong specifies text that is bold font Form and the types of input - Syntax - <form action=”/submit-url”></form> - The form element is a container for different types of input elements - form goes hand in hand with input - Syntax - <input type=”(type)” name=”(name)” placeholder=”(PlaceHolderText) required> - Attributes of input: - type is what specifies the kind of input - Different input types: - button - checkbox - color - date - datime-local - email - file - hidden - image - month - number - password - radio - range - reset - search - submit - tel - text - time - url - week - checked makes it so an input option is selected by default - name gives the input a name - Adding the same name to two different input types makes it so only one can be selected at a time - placeholder puts placeholder text until text is put in the textbox - id assigns a specific identification value to specific HTML elements - value assigns a value to an input - The default value is (name)=on, thus it is good practice to make the value the same as the id - required prevents the user from submitting anything without entering the required field - The label element is used to associate the text of an input with the input itself - Ex: <label><input type=”radio”> Indoor</label> - Explanation: The above example makes it so clicking on the word “Indoor” also selects the radio button as if the user clicked on the button as well - Wrapping just the text in a label using the for attribute is an alternative method - Ex: - <input id=”(id)” type=”(type)”> <label for=”(id)”> text</label> - There is also the button element - Syntax - <button>Text</button> - The button element gives the user a button to submit their input - button can use attributes like type as well - The fieldset element is used to group related inputs and labels together in a web form - Syntax - <fieldset> <label><input type=”(type)”>(text)</label> </fieldset> - The legend element acts as a caption for the content in the fieldset element - Syntax - <fieldset> <legend>text</legend> <label><input type=”(type)”>(text)</label> </fieldset> Footer - Syntax - <footer> Contents </footer> - The footer element is used to define the footer of a document or section, typically contains info about the author, copyright data, links to terms of use, contact info, etc Head - Syntax - <head> Contents </head> - The head element contains metadata about the page (title, scripts, stylesheets) - You can set browser behavior by adding self-closing meta elements in the head - Ex: <head> <meta attribute=”value”> <title>title</title> </head> - Explanation: The above example is an instance of describing metadata within an HTML document - Meta attributes in HTML: - charset - name - content HTML - Syntax - <html> <head> </head> <body> </body> <footer> </footer> </html> - The html element is the root element of an HTML page which the entire pages contents will be wrapped in IMPORTANT: All DOCUMENTS SHOULD BEGIN WITH <!DOCTYPE html> BECAUSE IT ACTS AS A DECLARATION AND ENSURES THE BROWSER TRIES TO MEET INDUSTRY-WIDE SPECIFICATIONS. <!DOCTYPE html> ALSO TELLS THE BROWSER THAT THE DOCUMENT IS HTML 5 CSS